Upcycle a Christmas Jumper

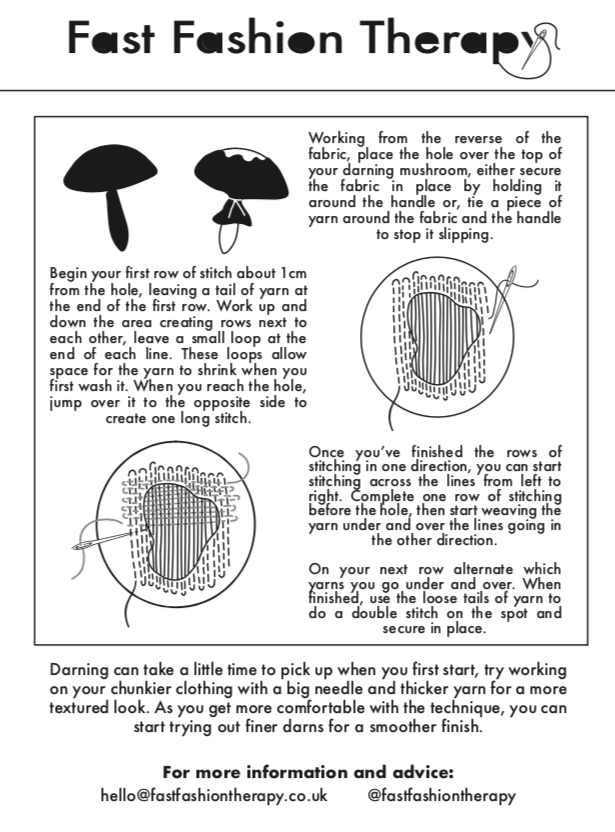
It is estimated that 12 million Christmas jumpers will be bought this festive season despite 65 million lurking in the back of the wardrobe according to charity Hubbub. Speaking in The Daily Telegraph, the Charity’s project co-ordinator Sarah Divall suggests customers ‘swap, buy second-hand or re-wear and remember a jumper is for life not, just for Christmas.’

These facts inspired us to create two upcycling workshops to combat this example of fast fashion, textile and plastic waste (up to 75% of Christmas jumpers contain acrylic, a form of plastic)

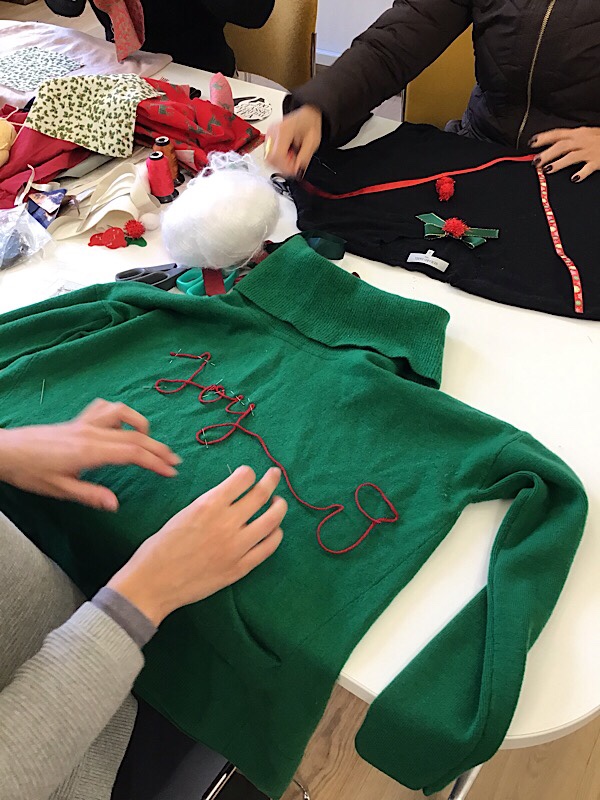
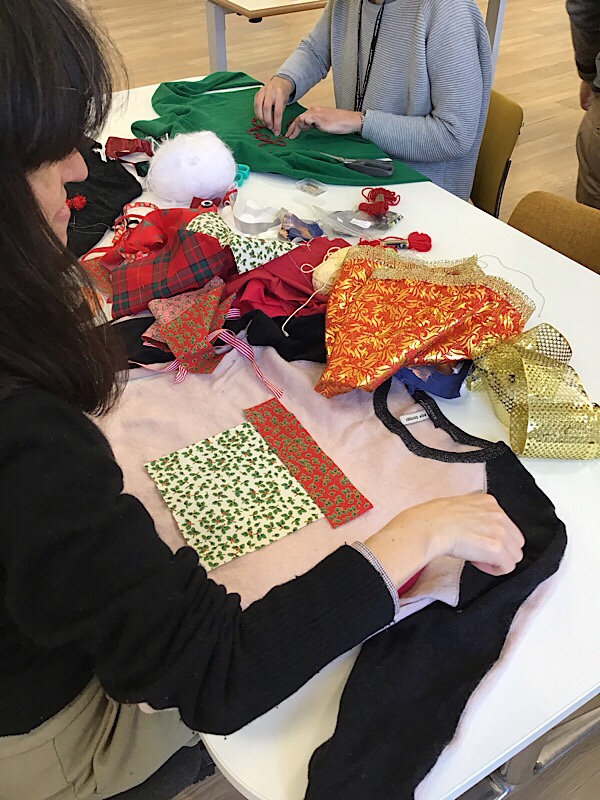
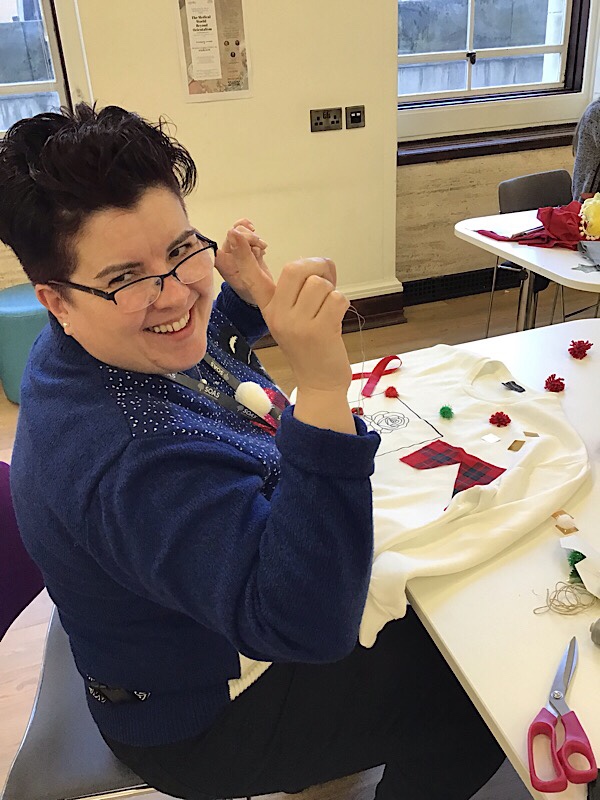
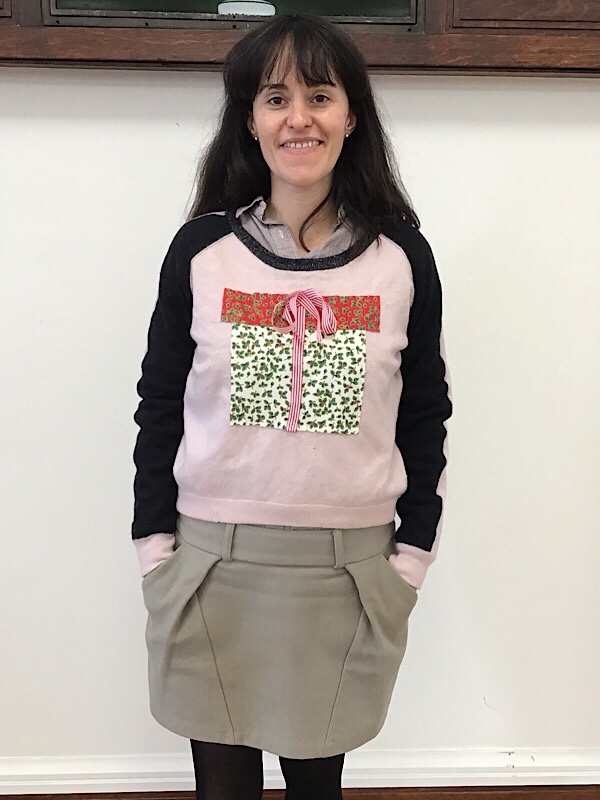
Upcycle a Plain Jumper Into a Christmas Jumper

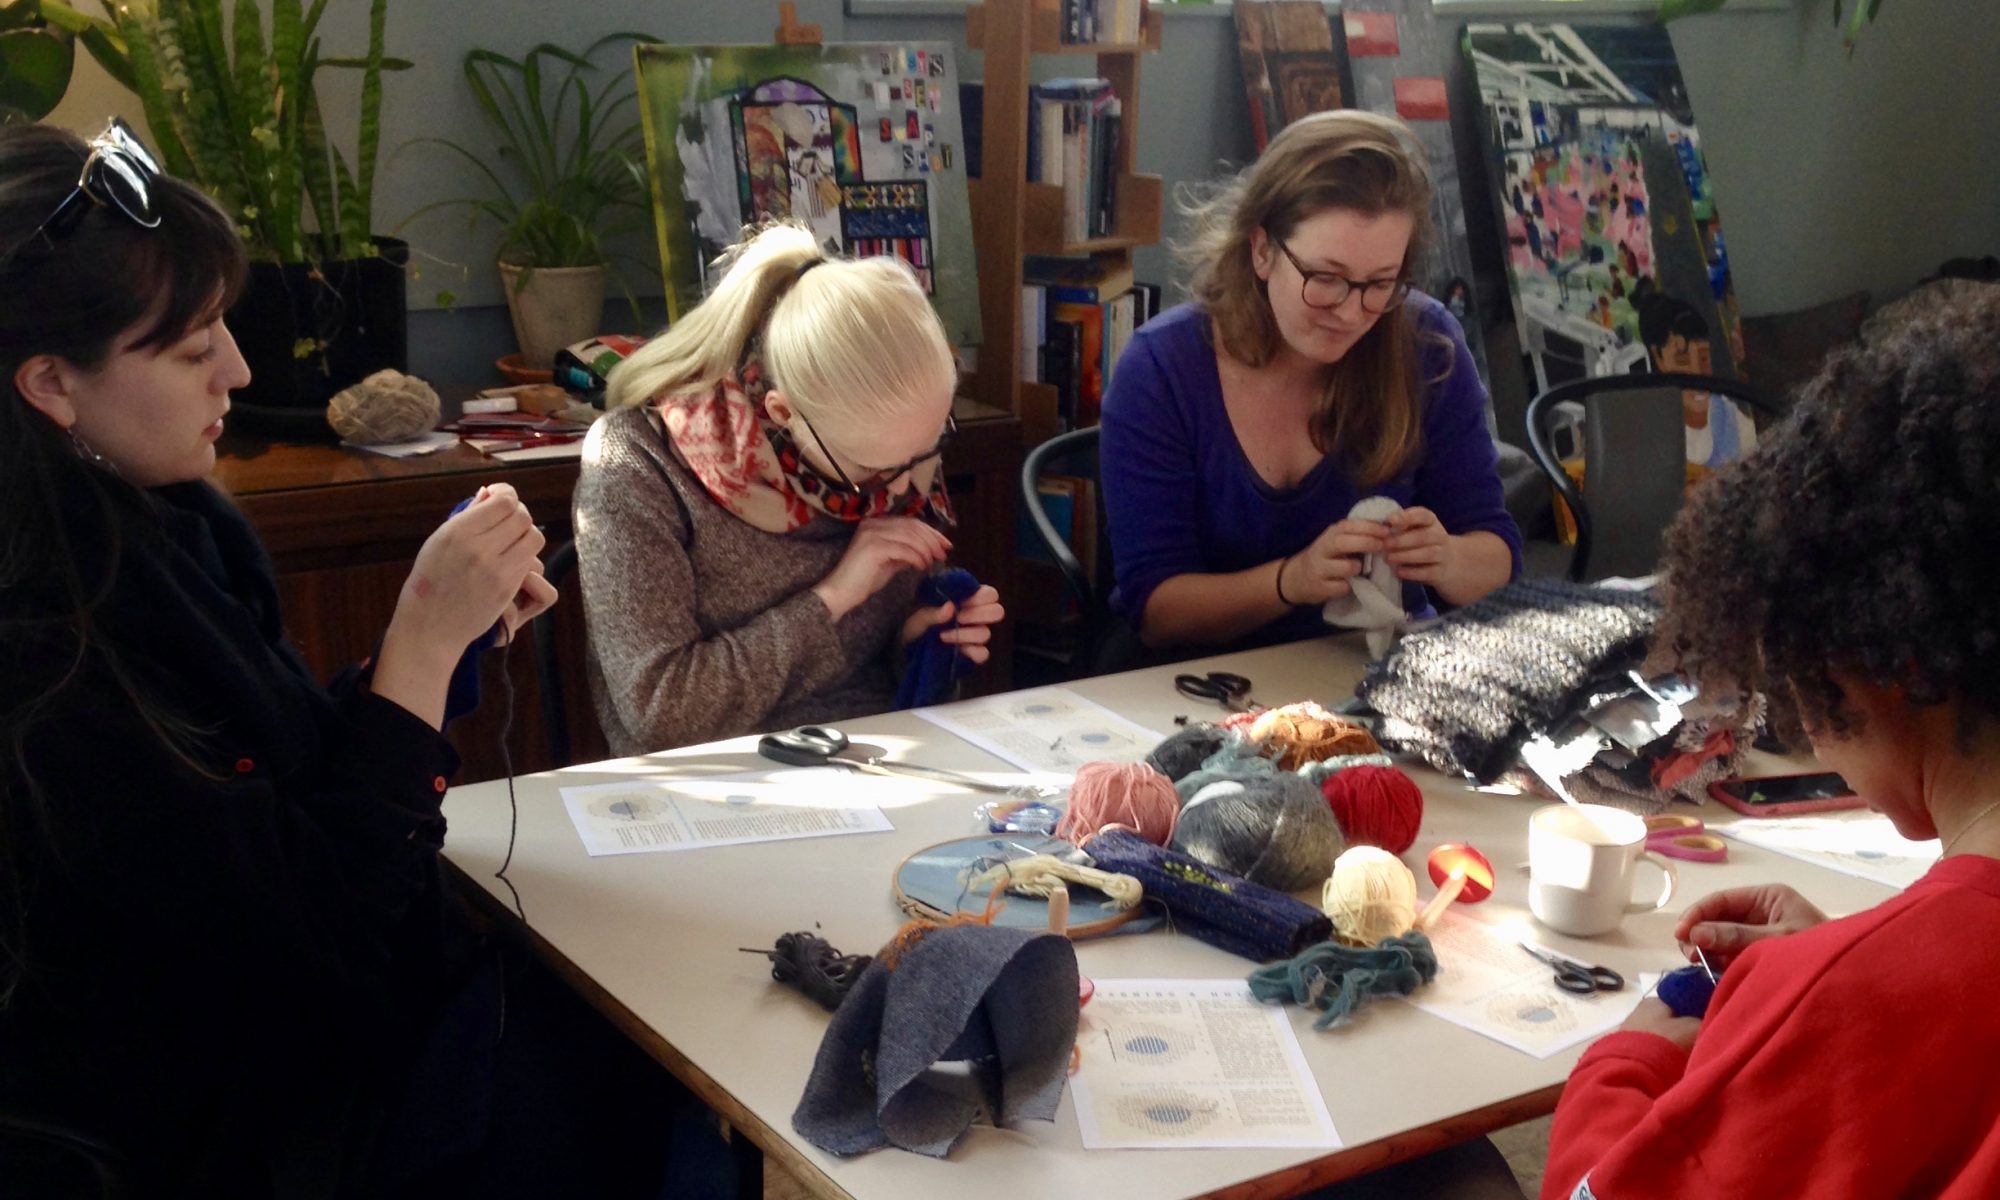
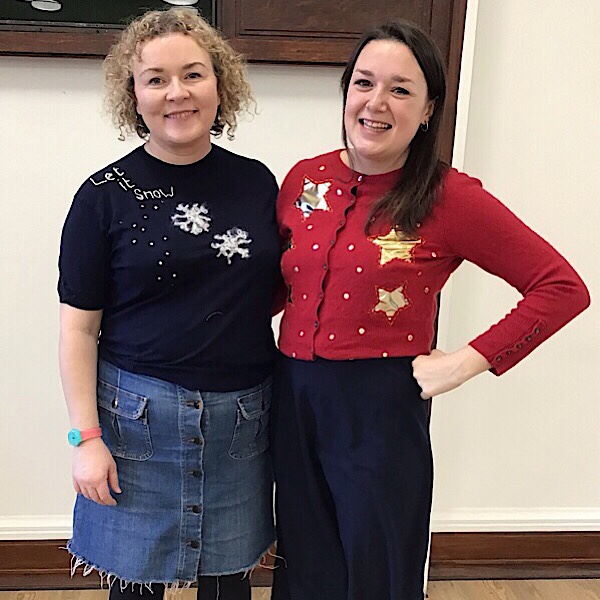
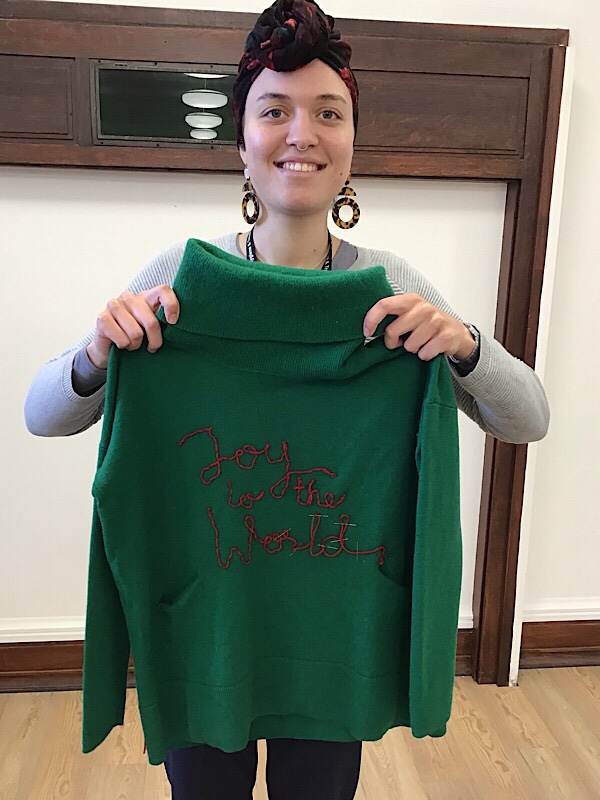
The London School of Hygiene and Tropical Medicine asked us to help their staff and students create festive jumpers from plain knitwear already in their wardrobes as part of their Sustainable Christmas Fair. We were really impressed with everyone’s creativity. Techniques such as couching, appliqué and embroidery were applied using festive trims and fabric remnants we picked up at Charity shops. There are plenty available this time of year.

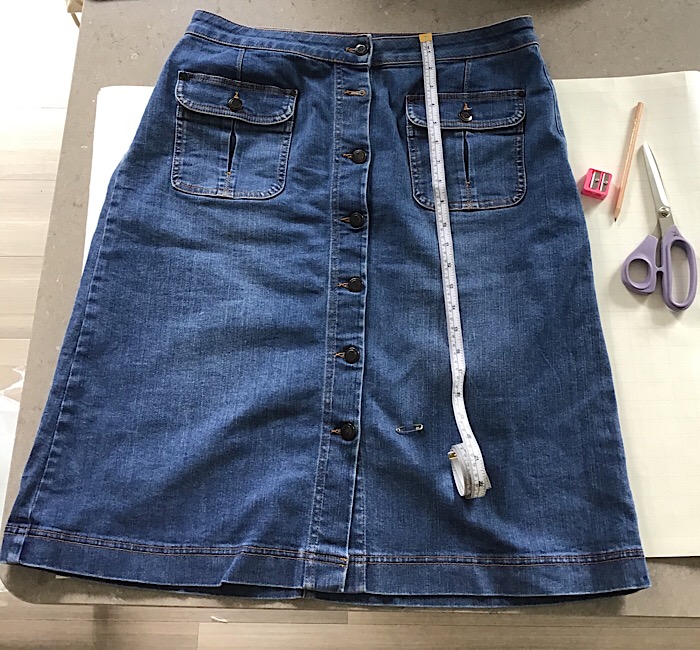
Upcycle a Christmas Jumper to Wear All-Year

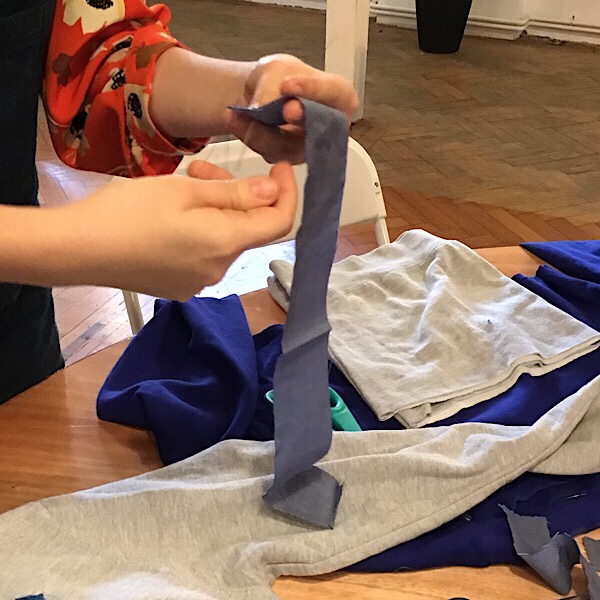
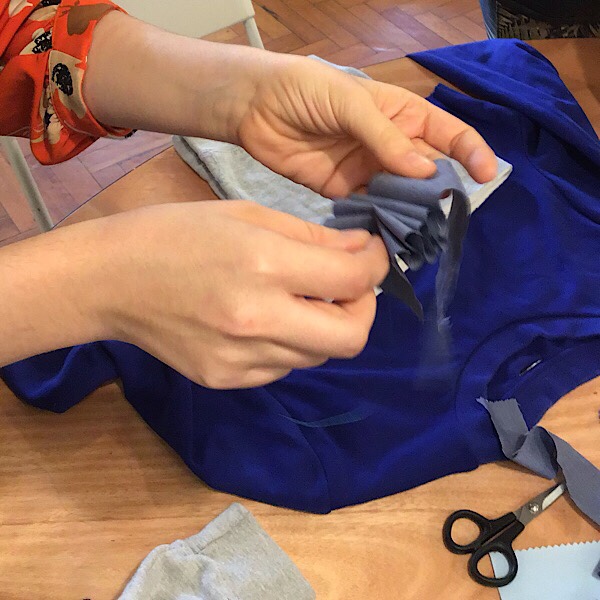
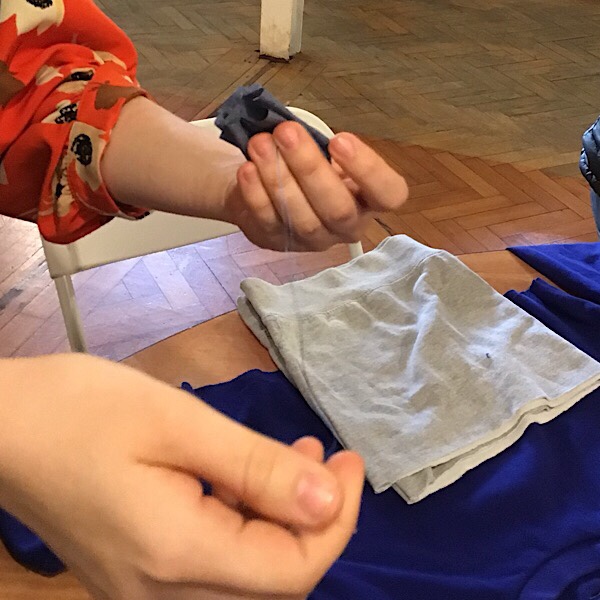
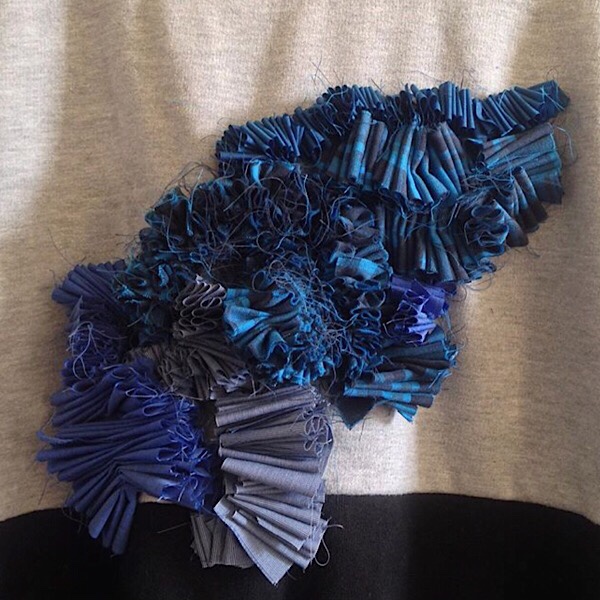
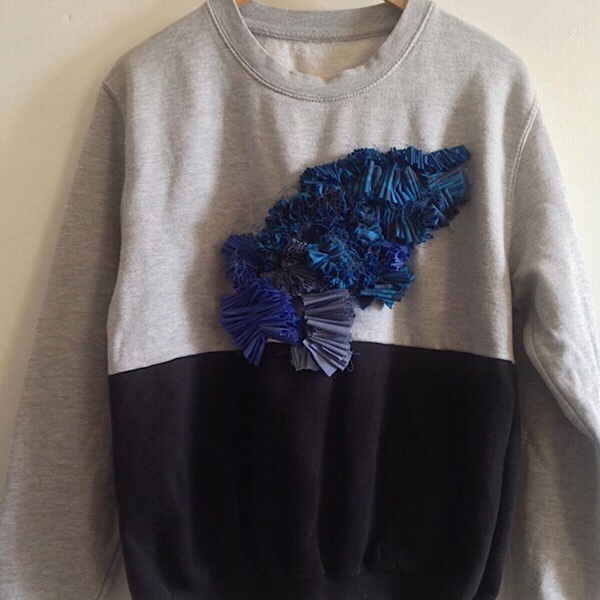
We launched our December workshops at Buy a Gift’s Zero Waste Christmas market. Alternatively we took a Christmas jumper, added embellishments to create a jumper we could wear all year round. Ruching scrap fabrics and appliqueing them over the Christmas motif. This effect can be used to cover any branding on sweatshirts and t-shirts.

We run a variety of fashion repair and upcycling workshops for up to 15 people. Please email us on hello@fastfashiontherapy.co.uk to book us for your sustainable fashion event or click on our event calendar for our upcoming workshops.

Fabric Scrap Busting Gift Bags

Are cotton tote bags worse for the environment than plastic bags? It is a debate we have been reading this year, first published by Quartz Magazine after the results of Denmark’s Ministry of Environment and Food 2018 life cycle assessment were published. Taking into account the amount of earth’s resources it takes to produce cotton they argue that a plastic bag could be less impactful than a cotton one. Click here to read the full article.

One view we think is missing from the conversation is a bag made from scrap fabric. If a single use plastic bag creates litter and a cotton bag uses up valuable resources, how about making a bag from textiles that would otherwise be thrown away?

Below are the instructions to make a small tote bag, perfect to use as a gift bag and save on sparkly paper that can’t be recycled. Or keep for your own use, they work brilliantly to carry a packed lunch, water bottle and reusable coffee cup.

How to Make a Small Gift or Tote Bag

Materials required
  • Two pieces of fabric , both the size of an A3 piece of paper (apx 30 x 42cm)
  • Or sew smaller scraps of fabric together to create a bigger piece
  • Dressmaker pins
  • Polyester all sew thread
  • Fabric scissors
  • Iron and ironing board
  • Sewing machine (or come to our free class at The Create Place to use the machines there)
Instructions
  1. Lay a piece of A3 paper one one piece of the fabric (or measure with a tape measure and mark with a pen or tailoring chalk)
  2. Pin around all 4 edges then cut around the paper with fabric scissors
  3. Remove the pins and the paper
  4. Repeat steps 1 to 3 for the second piece of fabric
  5. Match up the two pieces of fabric, placing right sides together
  6. Pin together along one of the short edges (placing pins vertical to the edge)
  7. Sew along this edge using a 1.5cm seam allowance
  8. Zig zag or overlock the raw edge of this seam
  9. Keeping the pieces together, fold over the bottom sewn edge by 4cm.
  10. Press in place and pin
  11. Pin along the two longer sides, place pins vertical to the edge (making it easier to remove as you sew)
  12. Sew along the two long sides using a 1.5cm seam allowance, incorporating the folded edges
  13. Remove pins then zig zag or overlock the raw edges
  14. Hem the top of the bag: fold over the top edge of the fabric by 1cm, right side to wrong side, press with a hot iron
  15. Fold again by 3cm and press, then pin in place
  16. Stitch around the hem approximately 0.5cm from the hemmed edge
  17. Measure the length of straps you want (we’ve used fairly short straps). Add 3cm to this measurement
  18. Cut two pieces of fabric measuring 8cm wide x the length of the straps required
  19. Take one of the strap pieces, fold over each short edge by 1cm, right side to wrong side and press with a hot iron
  20. Fold over one of the long edges by 1cm, right side to wrong side, press with a hot iron
  21. Repeat on the other long side
  22. Fold the strap in half, wrong sides together. Press and pin in place
  23. Sew the two short edges and then the long edge together, sewing as close to the hemmed edges as possible. This can be done in one long stitch if you pivot at each corner. Click here for a YouTube video on how to pivot on a sewing machine.
  24. Repeat steps 15 to 19 for the other strap
  25. Lay the bag flat and find the centre point at the top of the opening by folding the bag in half width wise and marking the point with a pin. Lay the bag flat again.
  26. Take one short strap end and place 3cm to the right of the centre front, pin in place
  27. Take the other end of the same strap and place it 3cm from the left of the centre front point. Pin in place
  28. Turn over the bag and repeat steps 21 to 23 with the other strap
  29. At this step, decide if you want the strap ends to show on the front of the bag or place them on the inside of the bag. Either way, line up the short edge of the strap just below the line of stitching on the hem and re-pin in place
  30. Sew the straps in place by sewing in a square on the strap. Start at the point where the top edge of the bag lines up with the strap. Sew a horizontal line then pivot and sew down to the same level as the row of stitching at the hem.
  31. Pivot again and sew along the hem line. Pivot for a forth time until you reach the starting point.
  32. An optional extra: sew a criss-cross line from each corner
  33. Press the bag and it is ready to use!
Suitable Fabrics

Cotton and linen woven fabrics are the most versatile and will withstand washing. More delicate and stretch fabrics will look pretty as a gift bag and handy to store items at home.

Where to find scrap fabrics
  • Old bed sheets, quilt covers and pillow cases
  • Old tea towels or bath towels
  • Scrap fabrics left over from dress making (the blue and yellow bag is a combination of fabrics left over from 3 different dressmaking projects)
  • Piece squares of fabric together to give a quilting effect and help use up smaller pieces
  • Old clothing beyond repair
  • Pieces of fabrics left over from alterations such as taking up the hem on jeans
  • Use ribbon for the straps or lengths of hem cut from clothes with their stitching intact

Repair Workshop: Memory Refresher

If you’ve come along to one of our Boro and Darning repair workshops, it might have been a few days/weeks/months since you’ve had a chance to keep practising your newly found mending skills. This quick-fire ‘how to’ guide can act as a little refresher and help you to get started again. You can download the PDF using the link at the bottom of the post, happy mending!

Update a Denim Skirt for Summer

It was time to admit that my favourite denim skirt was a bit too short for me. An A-line mini, I’ve worn it in summer with saddles, pulling on tights and boots for winter. The wear and tear of washing it over so many years has taken its toll and I got fed up of constantly pulling it down. So the skirt was listed on eBay and given a new lease of life by a happy customer.

This left a whole in my wardrobe and I needed something to replace such a staple item. As the weather turned warmer I pulled out my summer clothes from under my bed and remembered a long A-line denim skirt that I bought a few years ago. 1970’s style, I hadn’t worn it much as found the heavy weight denim too hot during last year’s heat wave. I got out my fabric scissors and took half an hour to create a new skirt.

How to shorten a denim skirt

  1. Put on the skirt and work out where you want the hem to finish
  2. Place a safety pin to mark the place and check you are happy with it
  3. Take off the skirt and lay on a flat surface
  4. Using a tape measure, measure the length from the top of the waist to the new hem
  5. Take a piece of tailors chalk. Measure from the waist to the hem marking the spot with the chalk creating apx 2cm line
  6. Working horizontally, measure the length of the skirt making a mark every 5cm.
  7. Once this has been done, draw up the dots to mark a line where the new hem is going to be
  8. Try the skirt on again to make sure it is the length you want
  9. Using sharp fabric scissors, cut along the line of tailors chalk. Cut one layer at a time rather than through the front and back.
  10. Try the skirt on again. The skirt can’t be lengthened but it can be shorter if it isn’t quite right
  11. Using a sewing machine, stitch around the hem 1cm in from the raw edge. Use either a matching thread or contrast.
  12. This line of stitching prevents the hem fraying too much. Sew a second line a few mm away from the first to give a twin stitching effect. Only if you are confident with your sewing, it isn’t essential
  13. The raw edge will naturally start to fray helped along with washing. Trim any threads that get too long and annoying

I’m really happy with my upcycled skirt – not too long, not too short. I’ve already worn it loads and it is easy to match with different tops. Have you got an item of clothing you have hardly worn because it isn’t quite right? Or maybe it is your favourite and needs a bit of TLC. Come along to our Fast Fashion Therapy workshop in East London to learn how to mend and alter your clothes. We have equipment and some materials for everyone to use. Book your space via our Facebook Page, beginners and more experienced sewers welcome. See you there!