Repair & refashion for a sustainable fashion industry
Category: How To
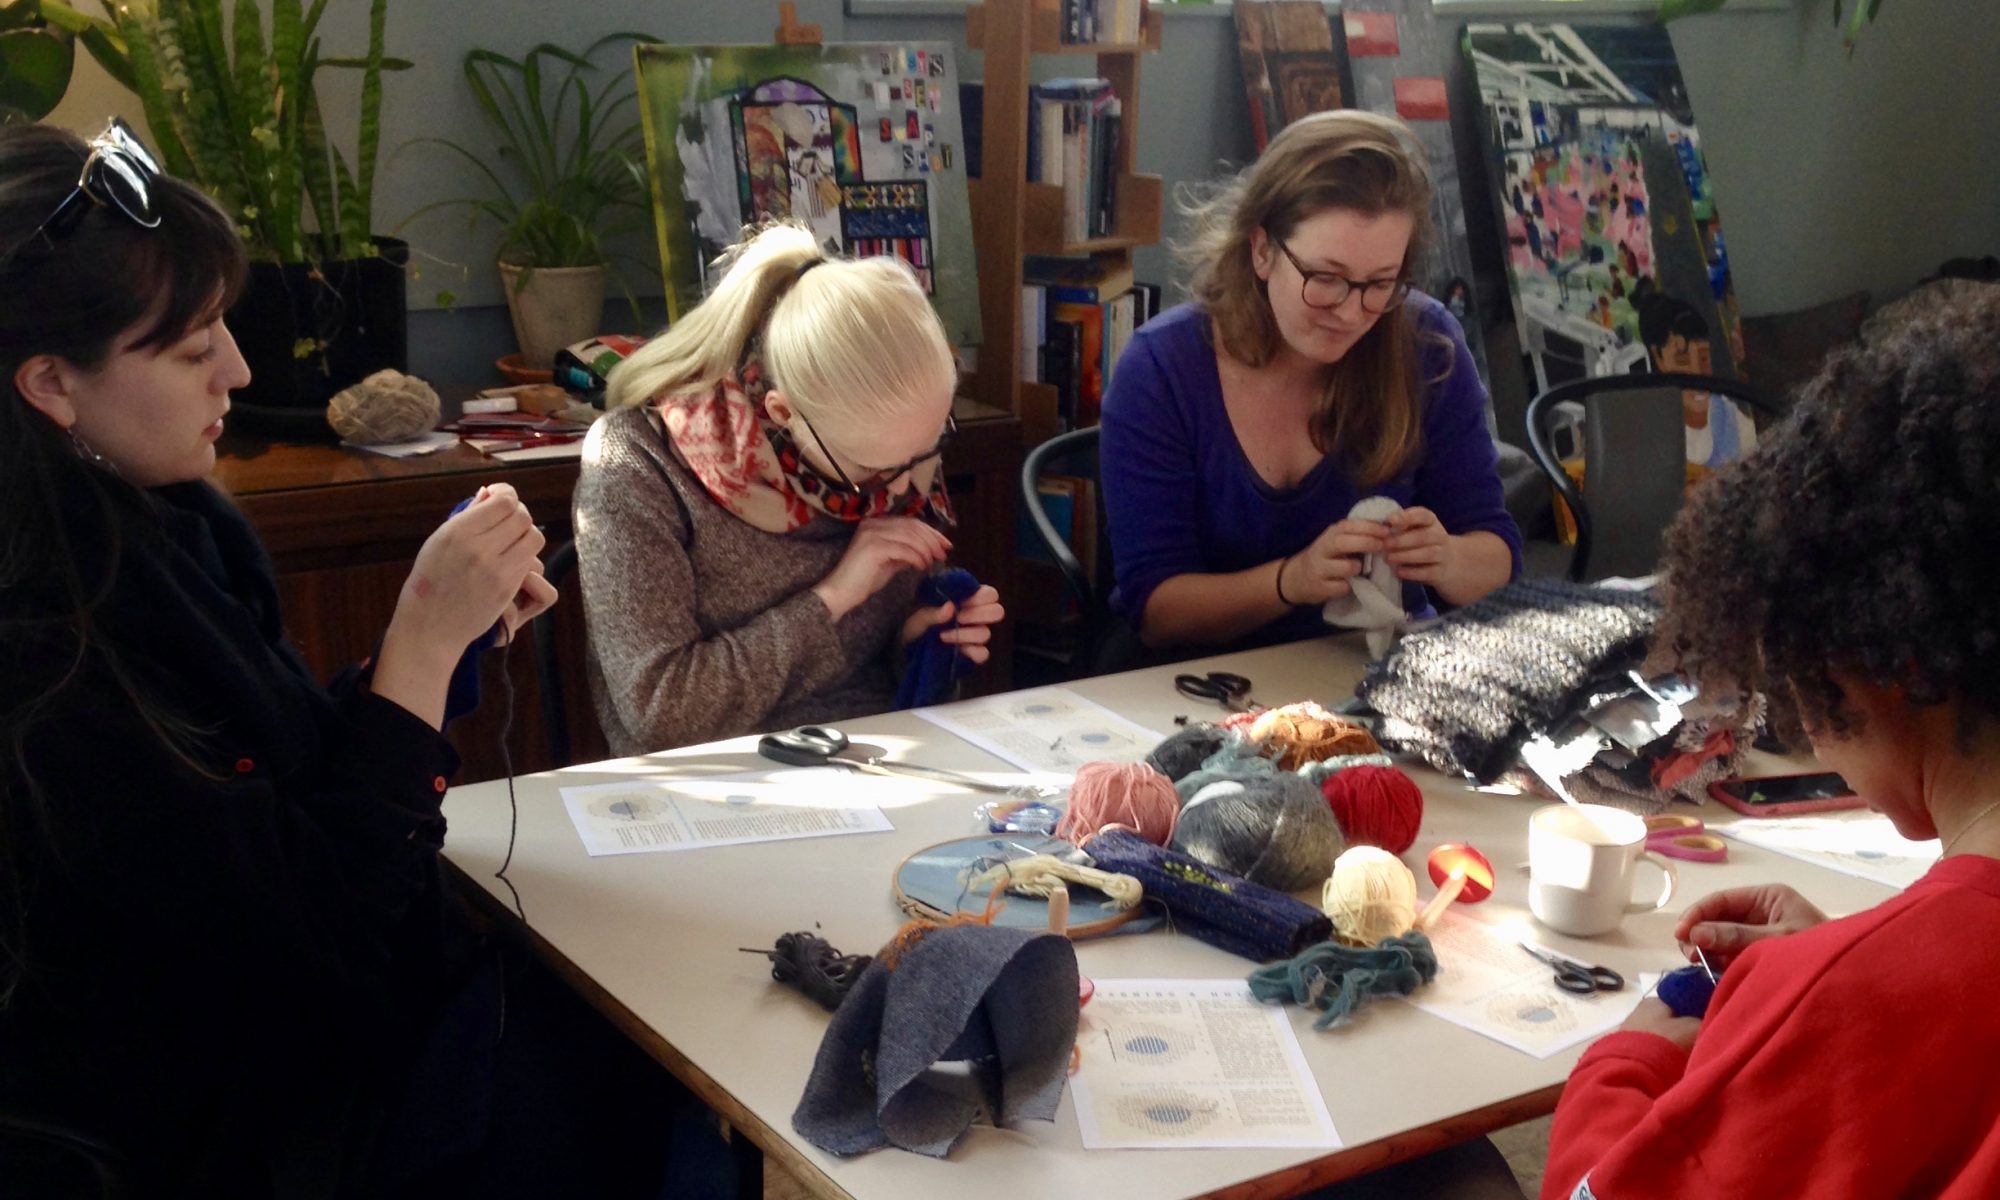
Videos and blog posts giving tips and demonstrations on how to mend and upcycle clothes. Promoting the repair and remodelling of clothes rather than throwing them away.
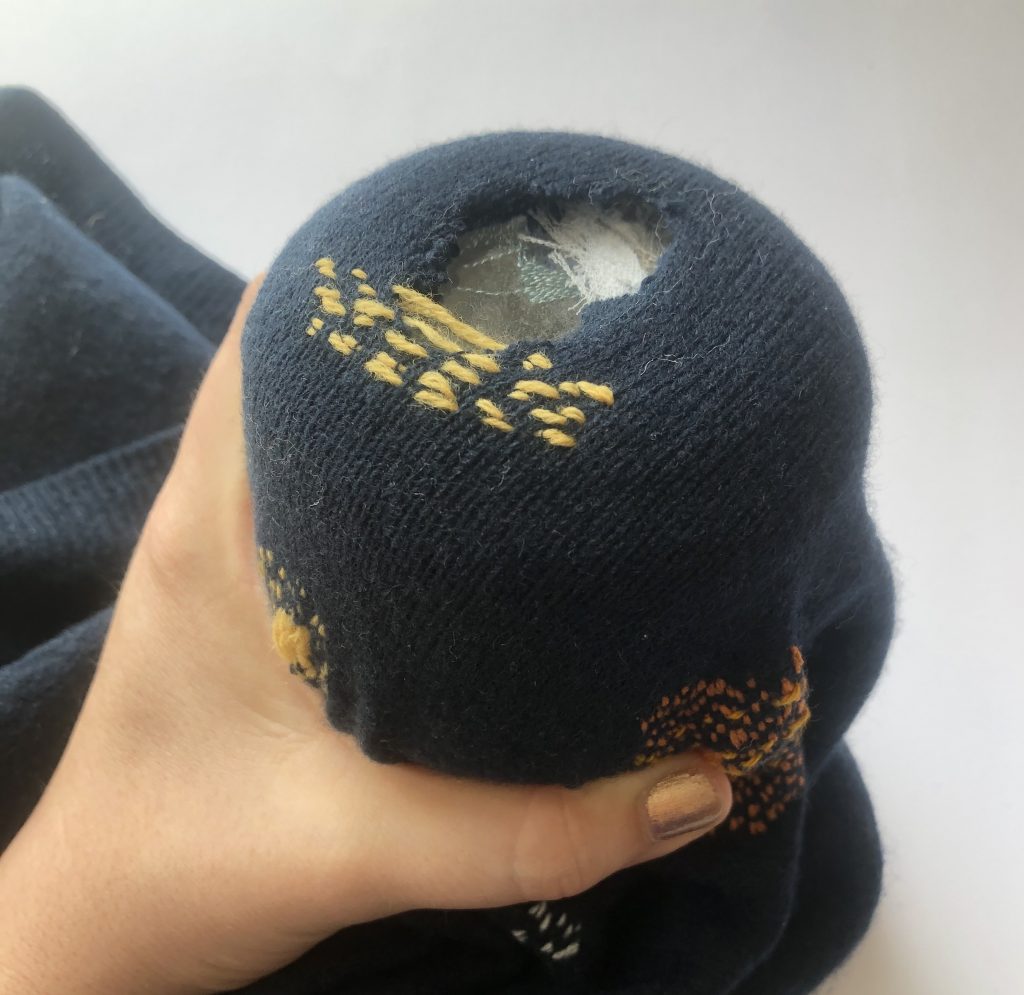
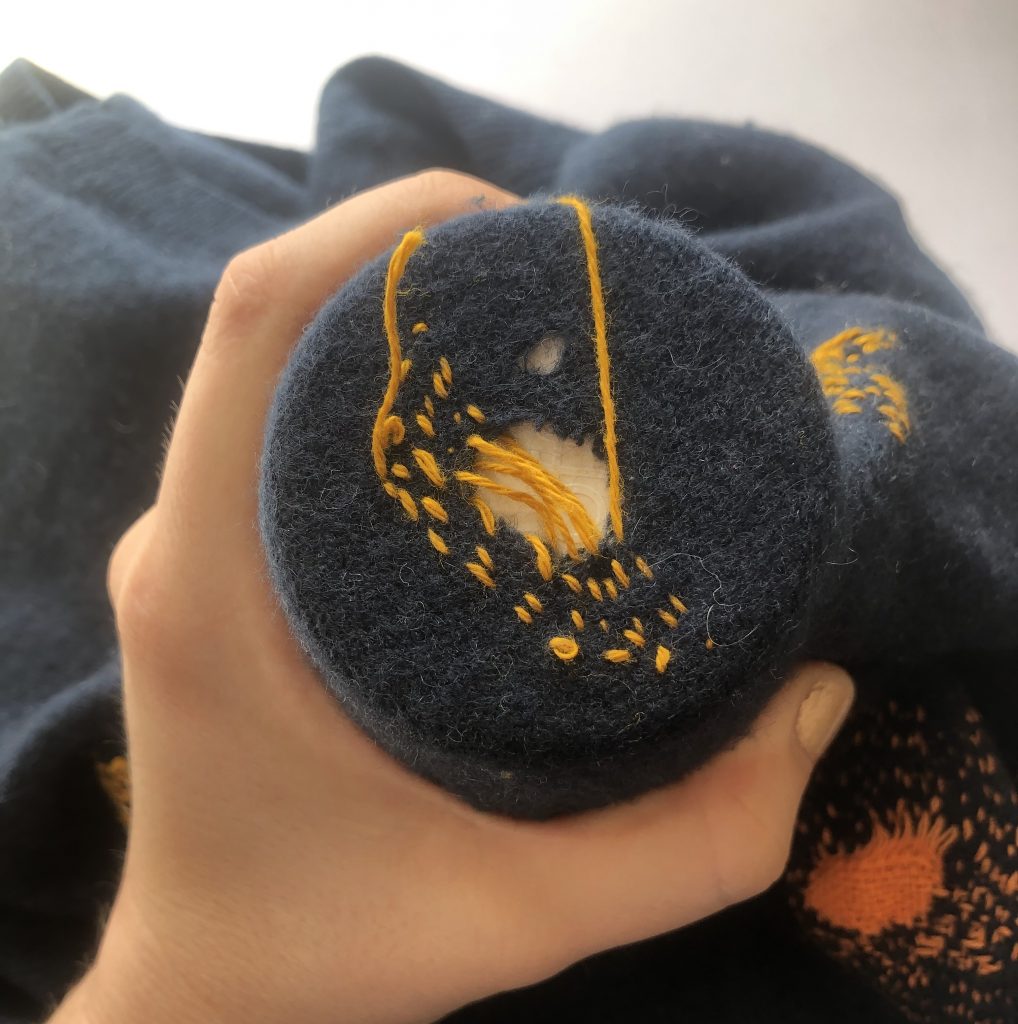
In these videos, we’ll go through some different techniques you can use for fixing holes or damage in knitwear if you’re looking for something faster or simpler than darning, or just to create a different effect.
Part 1 goes through a smocking technique and an eyelet technique, whilst part 2 goes through a version of ‘Boro’ patching for knitwear. For more information on ‘Boro’ take a look at our ‘Boro’ video and how-to on our blog.
If you’re looking for the yarns or materials you need to get started on these techniques, we’ve got some mending kits available on our Etsy shop.
We never manage to find jeans to fit us correctly, especially if they are from a charity shop or swishing event. We have listed step-by-step instructions on gaining a professional finish when taking up the hem on jeans
Sewing machine is advised as the denim is too thick for hand sewing.
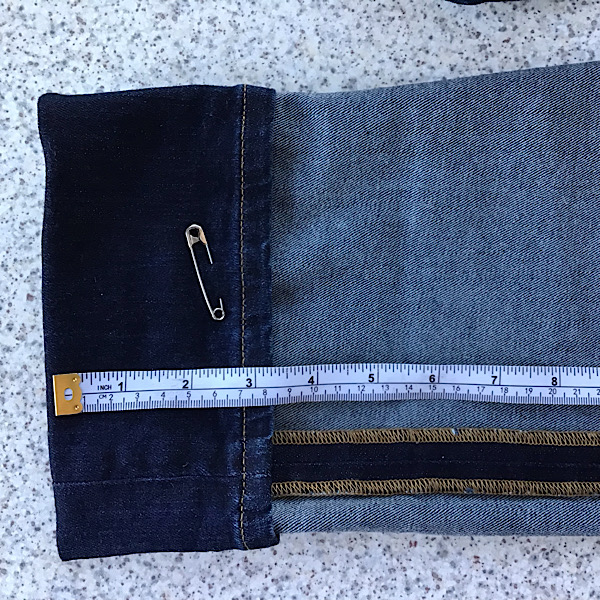
Try on the jeans with shoes. Tuck under the hem to where you want it to sit (on one leg). Hold in place with a safety pin
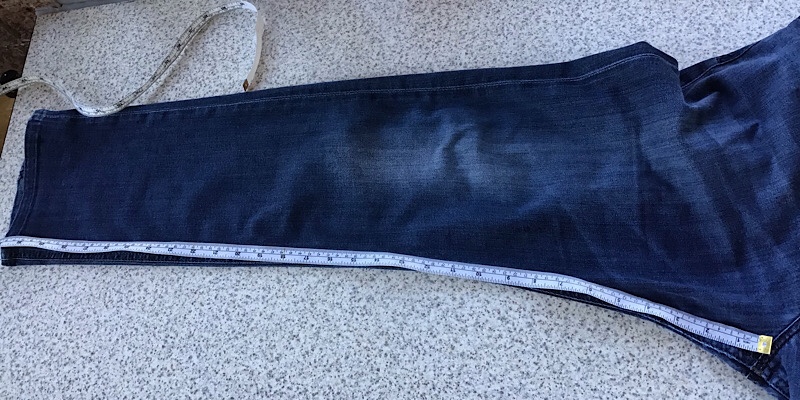
Lay the jeans flat. Measure from the crotch (where the two legs meet at the front) by placing the end of the tape measure at the crotch point. Pull the tape measure flat to where you have folded the hem. Make a note of the measurement. Now measure the other leg. Mark the point where the new hem is going to be with tailoring chalk or a safety pin.
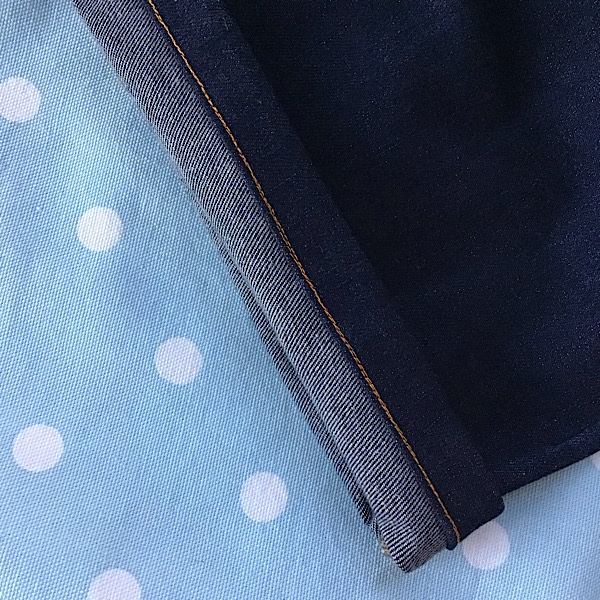
Measure the depth of the fold. For example this fold is 8cm from the fold to the edge of the hem. We need to account for a 2cm seam allowance. Take 2cm from this measurement, in this example, 6cm
We’ve created a ‘how to’ video on measuring and taking up trousers, the method of measuring is the same for jeans.
Using a tape measure and tailors chalk, mark 6cm from the hem around both legs of the jeans.
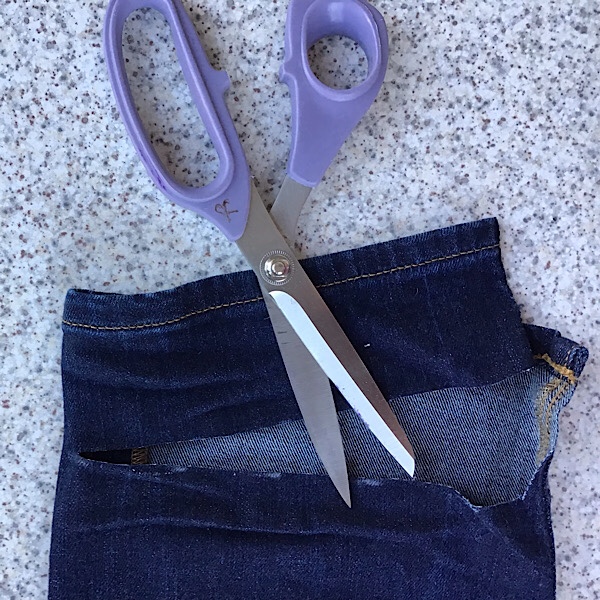
Using sharp scissors, cut around the mark you have just made
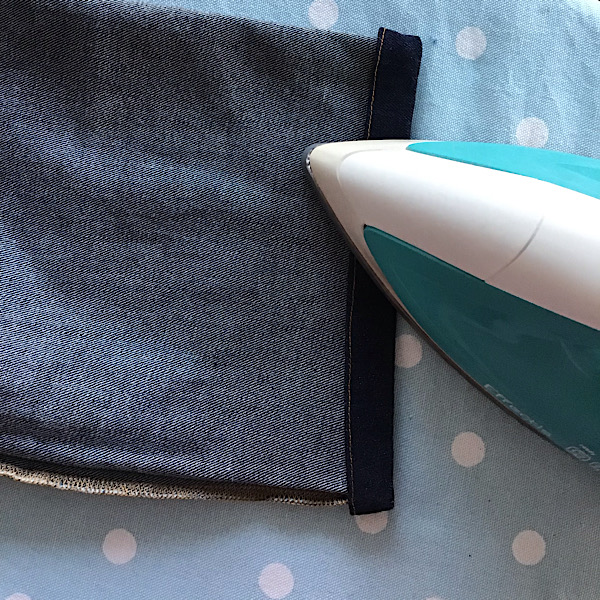
Turn the new hem, right side to wrong side, by 1cm. Press with a hot iron. Repeat on the second leg.
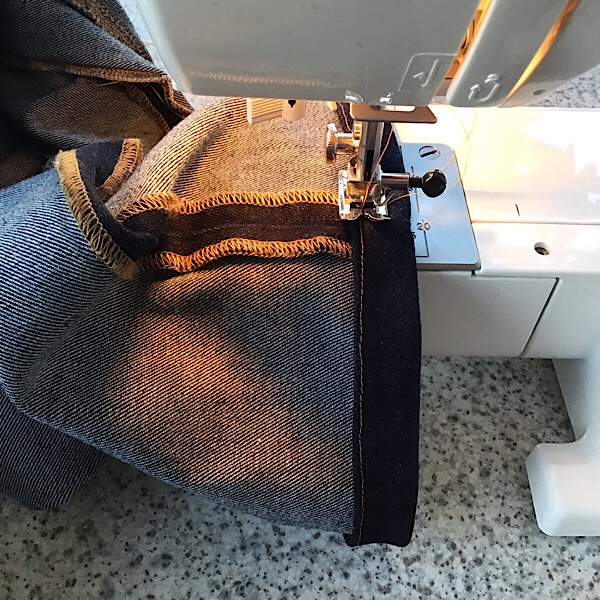
Using a sewing machine, stitch 2mm from the folded edge of the jeans. We’ve used an orange thread to match the original stitching. Repeat on the second leg. (It is advisable to test your machine on some of the spare denim to make sure it can get through the thickness of fabric).
Take the jeans back to the iron. Turn over by 1cm, right side to wrong side. Press with a hot iron. Repeat for the second leg.
Back to the sewing machine: Sew the hem using the first line of stitching as guide. Stitch over the same line of stitching.
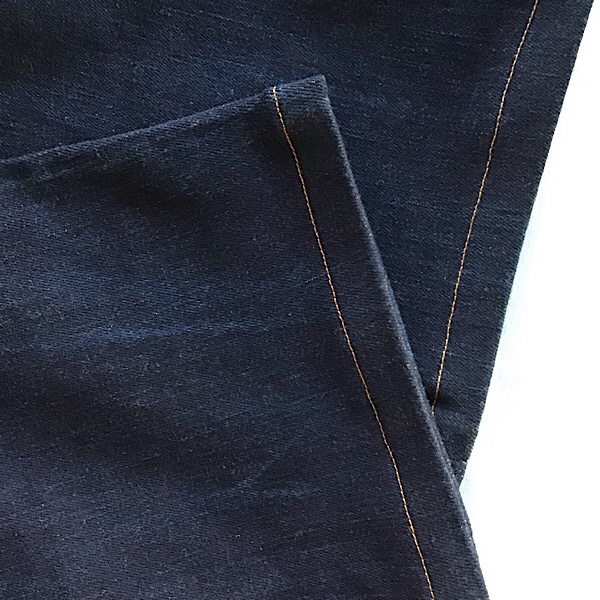
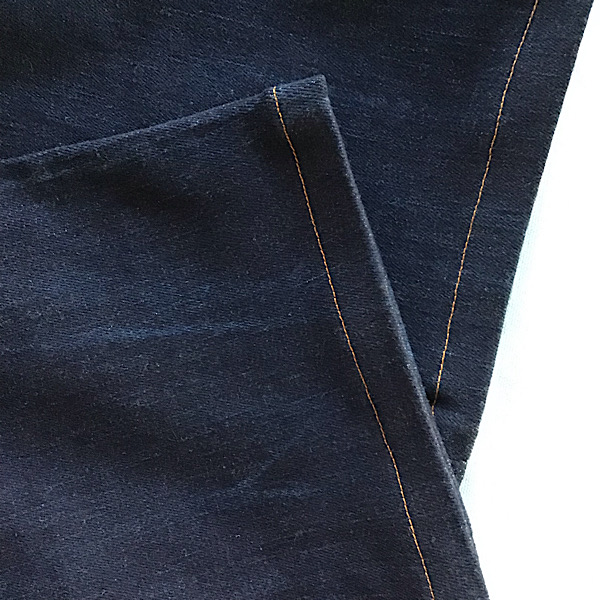
On the inside of the hem it leaves a thicker line of stitching, looks effective for turn ups.
On the front side only one line of stitching is visible. Give them a good press and you are ready to go!
Top tip: Keep the scraps of fabric left over from cutting the hems. They are useful if you need to patch these jeans or any other kind of clothes patching.
Clothes rarely fit perfectly when we buy them, especially if we have acquired them from a charity shop, vintage fair or clothes swap. Taking up a hem on a pair of trousers is a fairly simple task and you don’t need a sewing machine. The secret is to measure, try-on, measure, try-on. Repeat several times before cutting the hem.
A basic sewing repair kit is needed, including a tape measure, iron and ironing board
Watch our ‘how to’ video on taking up hems
We have filmed a separate video on how to hand sew the hem in place, click on the button below to be redirected to this blog post.
This same alteration technique can be used to shorten the hem of a skirt, dress, shorts or even sleeves. When measuring a skirt, use the waistband as the point of reference to measure down to the hem. Measure approximately 6 places around the skirt.
With a dress, find the waist point, usually there is a seam at the waist. Use this as a reference point in the same way as a skirt. For sleeves the measuring reference point is the armhole seam.
Top Tip: Save any pieces of fabric left over from cutting the hem. They are useful for patching clothes.
Looking for some specific advice? Book an appointment at our online repair cafe. Each appointment is 30 minutes to help you get started on your alteration or clothes repair.
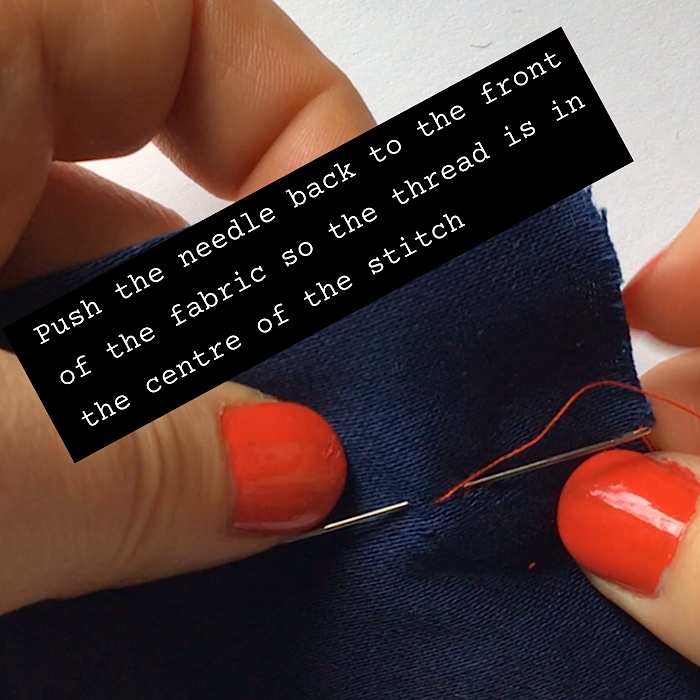
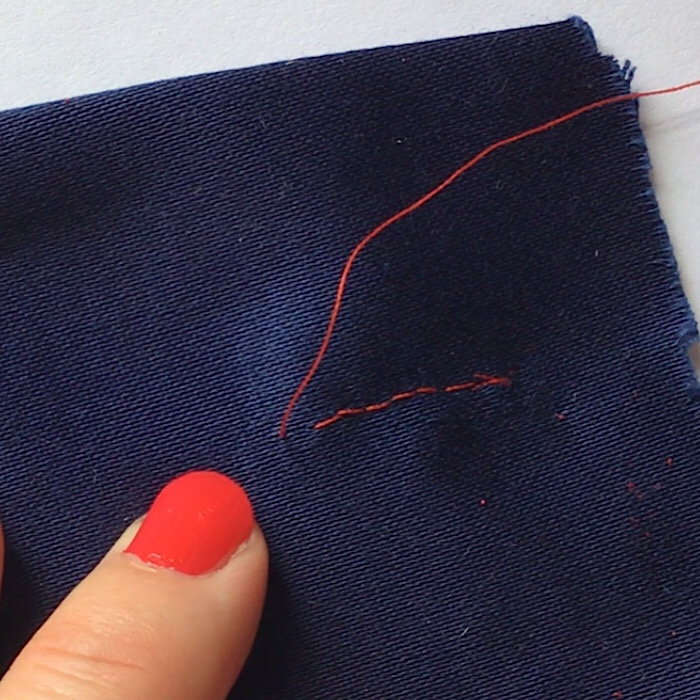
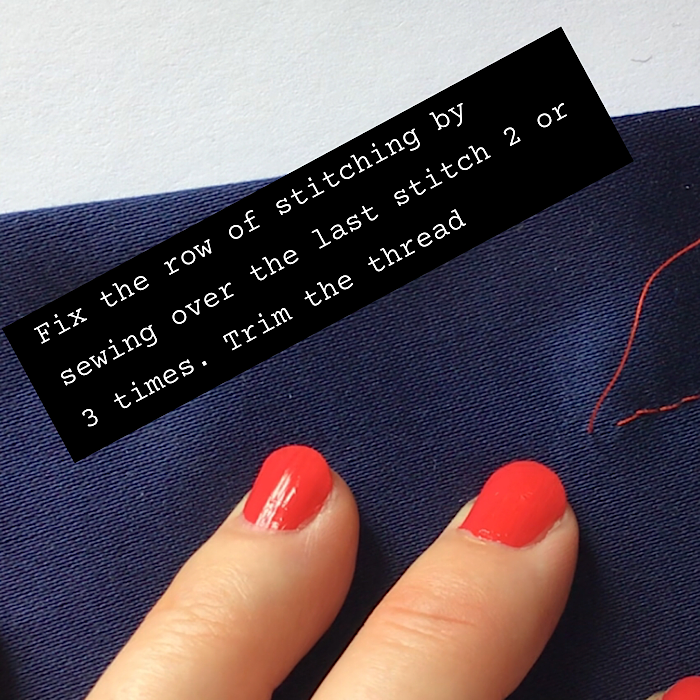
The stitching on hems coming undone is one of the most common clothes fixes at Fast Fashion Therapy. It is simple mend to complete with a needle, thread and sharp scissors. In this video we explain how to repair a hem with a hem stitch, or herringbone stitch. We use trousers as an example but the same method can be used on skirts, dresses and sleeve hems.
Most hems can be fixed without a sewing machine. Our video next week will run through how to shorten a hem on a pair of trousers.
We’ve got a new ‘Darning’ video tutorial on our YouTube channel!
This video will take you through the basics of how to darn holes in knitwear. The technique can be used on an area that’s just worn down or where a hole has appeared to strengthen the item of clothing and create a new piece of fabric in the damaged area. This video shows a visible style of mending but the same technique can be used to repair invisibly if you use a matching thread.
If you’re looking for the basic kit you need to get started on your darning, head to our Shop to find our new darning kits!
Don’t have a darning mushroom at home? How about something from your kitchen? Read our blog on what to use around your home in place of a darning mushroom.
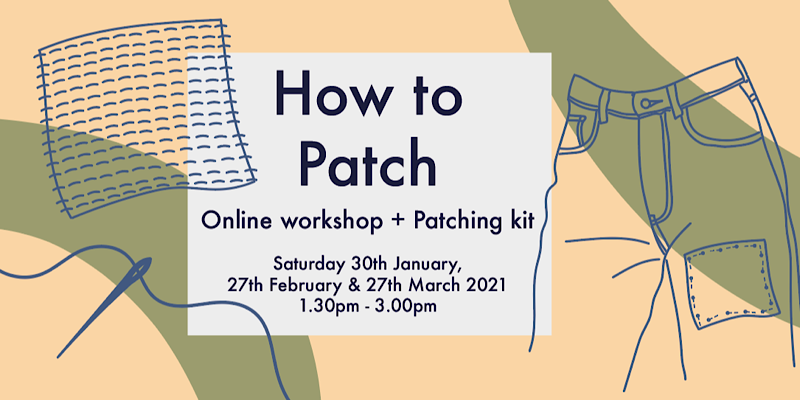
Learn the basics of how to mend your clothes with ‘Boro’ patching
This video shows you the basics of how to patch your damaged clothes and textiles using a technique inspired by the Japanese craft of ‘Boro’. If you’re looking for the sewing kit you need to get started, we’ve got patching kits available on our Etsy page
Or sign up for one of our patching workshops, £20 including a kit worth £10
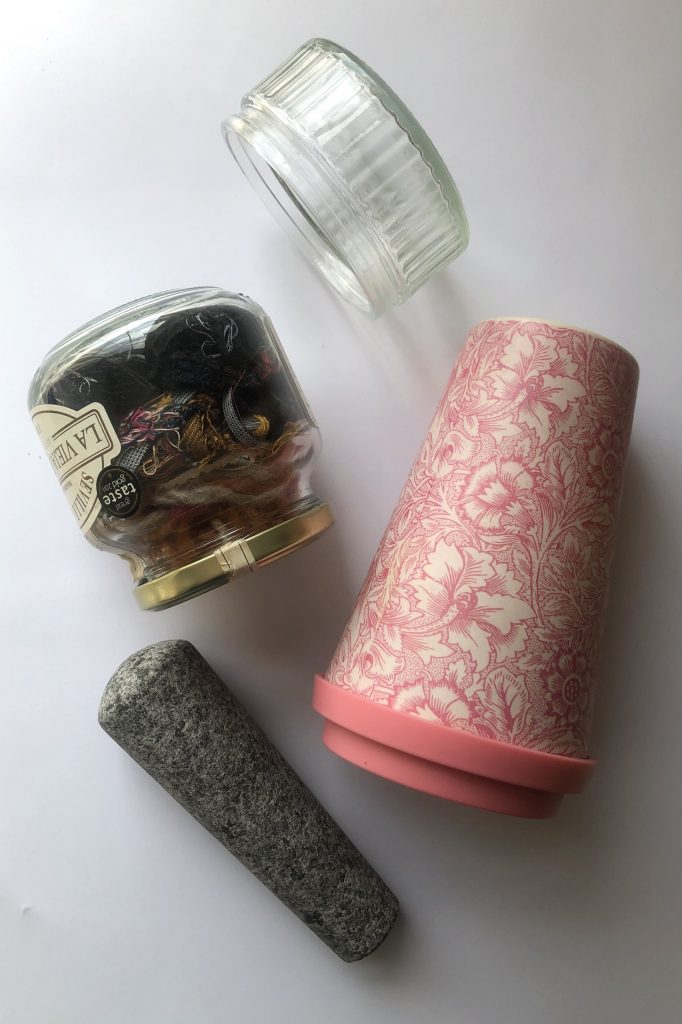
Alternative Darning Mushrooms – (Clockwise from top) GU Pudding Jar, Reuseable Coffee Cup, Granite Pestle, Old Marmalade Jar
If you’ve come along to one of our workshops in the past, you’ll know we normally have some darning mushrooms on hand to help you get fixing your favourite pieces of moth-eaten knitwear. If you’re thinking about getting your own darning mushroom, there are lots of second-hand ones on Ebay and Gumtree that are worth checking out, but we understand that getting a hold of your own darning mushroom might not be an option for you right now.
So what can you use instead? The main thing you need from your darning aid is a flat, hard surface to work on – avoid using anything covered in fabric, as this could get caught on your needle as your darning. Look for something that is fairly light and easy to hold, you don’t want to feel uncomfortable as your mending. Finally, think about the size of the hole that you’re mending, you may find something that works well for a small hole but doesn’t offer enough support on a larger area. Just like when you are learning a new technique, play around with different options to find what’s right for you! Below is a round-up of a few options we found around the home to use…
Marmalade Jar as an alternative Darning Mushroom
Option 1 – Old Marmalade Jar
This works well when using the bottom of the jar as it’s a large flat surface, the rounded edges have a similar feel to a normal darning mushroom and the area around the lid is quite easy to hold. It is a bit wider to hold than a normal mushroom so may take a bit of practice to get a comfortable position.
GU pudding jar used as an alternative Darning Mushroom
Option 2 – Old GU Pudding Jar/Glass Ramekin
This is a great excuse for buying a GU pudding as a treat as well! This one works well as the jar is not too deep so you can hold the fabric underneath as you would around the mushroom handle. The base of the jar is large and flat so can fit lots of different sized holes on.
Reuseable Coffee Cup as an alternative Darning Mushroom
Option 3 – Reuseable Coffee Cup
This one is useful for smaller darns as the bottom is narrower than the top. This is a bamboo cup so the fabric could slip around a bit as you’re working on it, securing it in place with a tie around the bottom could help.
Granite Pestle as an alternative Darning Mushroom
Option 4 – Granite Pestle
This one is really nice to hold and has a similar feel to holding a Darning Mushroom. The pestle used here is quite narrow so would only work with smaller holes, but different sized pestles could be more adaptable!
Let us know if you find any alternatives around your home that we haven’t mentioned here. We’ll be posting a ‘Darning’ how-to video in the next week to give you more support with your mending at home.
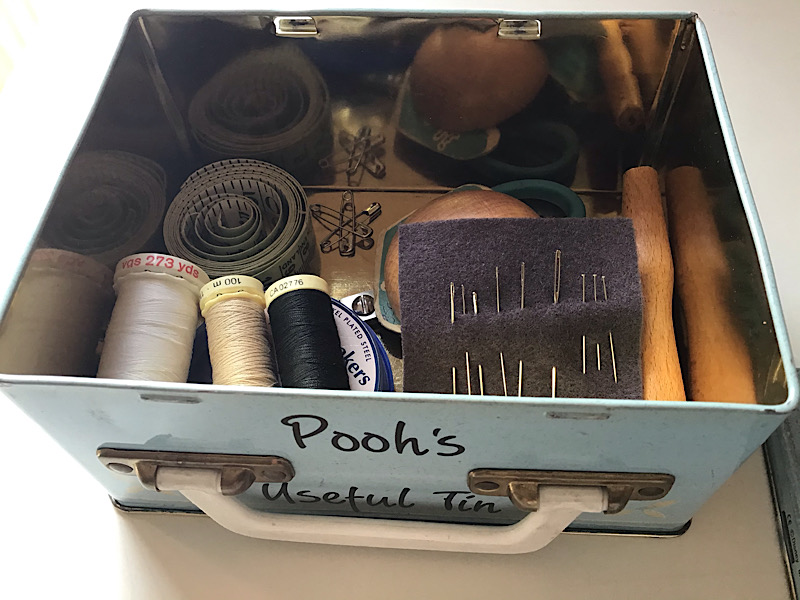
Are you new to clothes mending but don’t have any sewing equipment? It is easy and inexpensive to pull together a few pieces ready to repair your clothes.
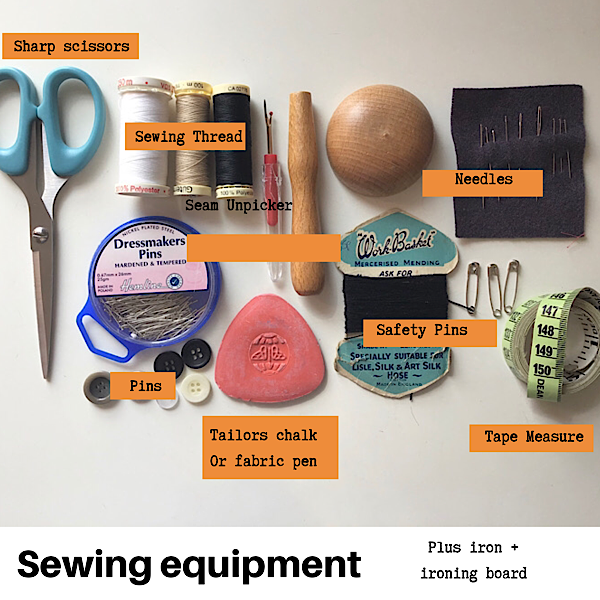
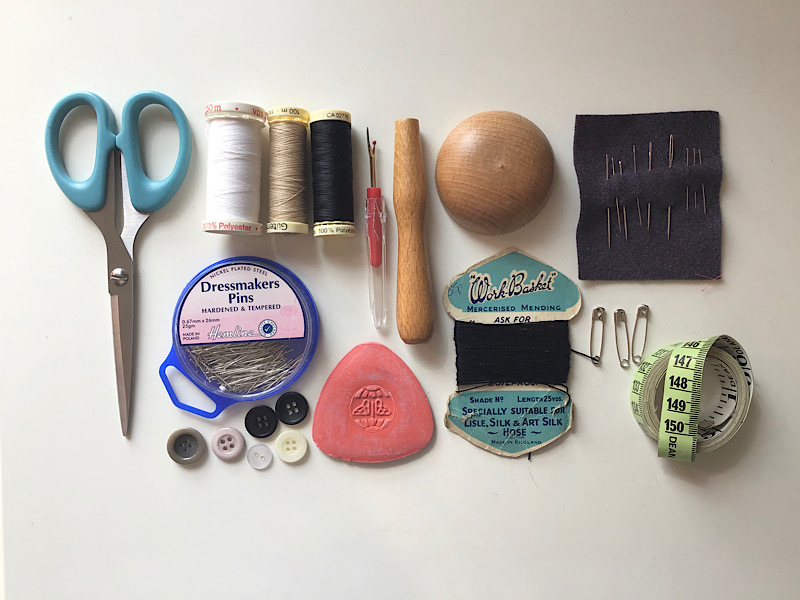
Basic clothes repair kit (from left to right)
Sharp pair of scissors – only use for cutting fabric and thread. They will become blunt if used for cutting paper. Regular stationery scissors are OK as long as they are new or have recently been sharpened
Threads – Black and white are essential, a neutral colour such as beige and grey are useful as is navy. Poly/cotton thread is the most versatile for all garments.
Seam ripper or unpicker – a sharp tool which helps to unpick hems for alteration or to remove broken zips
Darning mushroom or egg – Makes it easier to darn holes in jumpers, t-shirts and socks
Set of needles – a variety of sizes is useful. Some with bigger ‘eyes’ or holes to for knitting yarn to feed through. Plus thinner smaller needles for finer fabrics
Tape measure – for measuring the hemline of trousers and jeans for alteration
Safety pins and dressmaking pins – for patching and alterations
Darning yarn – to repair jumpers and socks
Tailors chalk or a fabric marker – for alterations
Spare buttons
Use an old tin or plastic box to keep your repair kit in one place
Where to buy equipment
Many pieces in our repair kits have been donated by friends of Fast Fashion Therapy. We prefer pre-used equipment as much as possible. Ask around, you might know someone who has more sewing equipment than they need. Charity shops are usually an excellent place to find sewing odds and ends but sadly not at the moment with all the shops closed. Ebay and Etsy are a good online alternative, especially for darning mushrooms. Or try your local haberdashery store and see if they have an online shop whilst we are practising social distancing.
Darning and Patching Kits
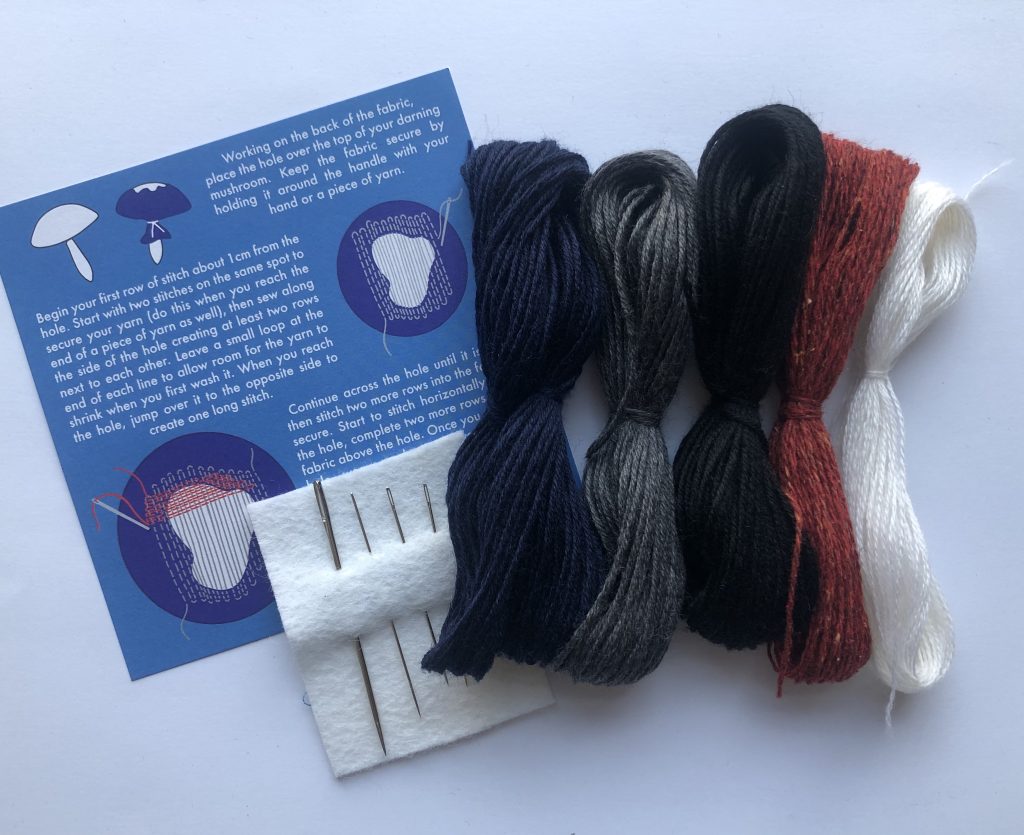
We have created Darning and Patching Kits to help get started with various coloured yarns, swatches of fabric, different sized needles and an instruction card. All kits cost £10 (free shipping to UK). We also have a pack of spare buttons, all on our Etsy shop
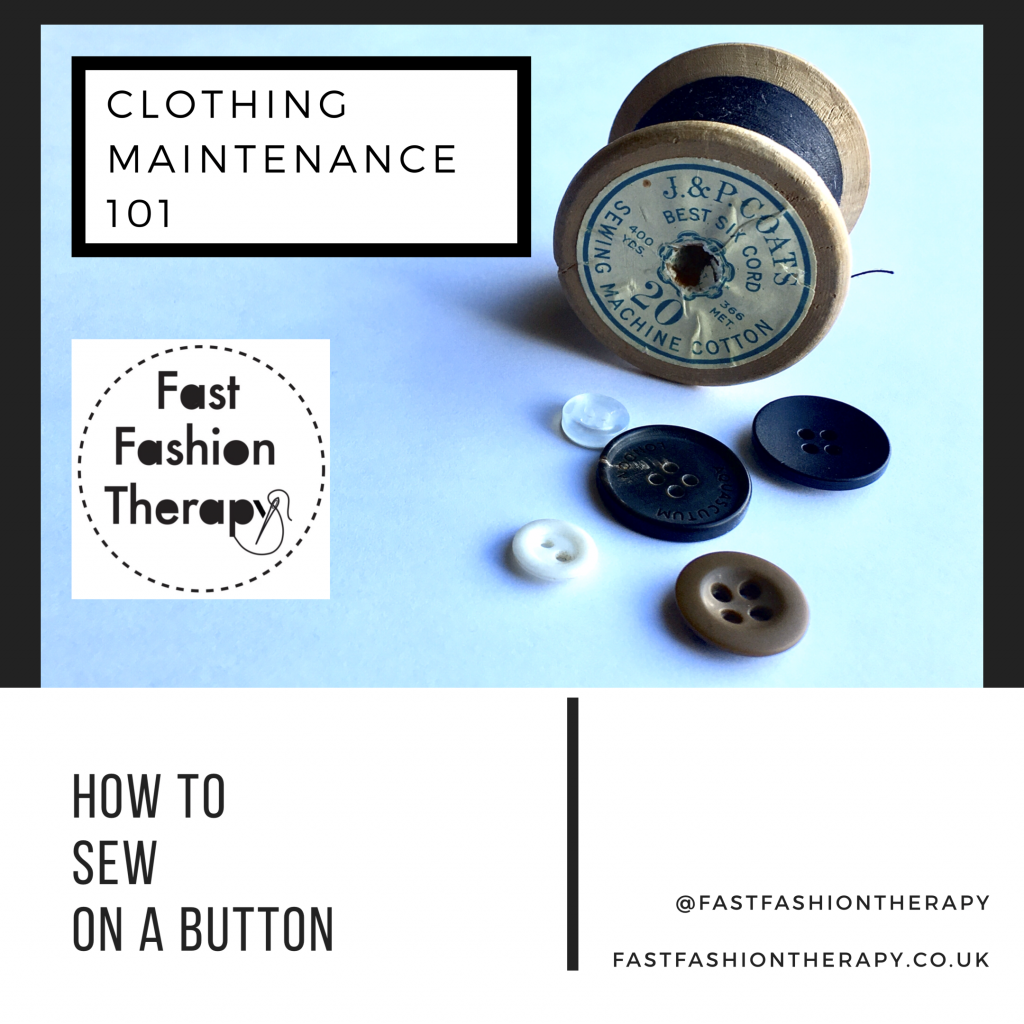
Sometimes it is the small things that stop us from wearing our favourite clothes. In our series, Clothes Maintenance 101, we demonstrate common fixes helping to make our clothes wearable again.
Sewing on a button is a simple task. It doesn’t take very long if you know how and have a basic sewing repair kit. In this video Sarah runs through the variety of buttons available and how to fix them back onto a garment.
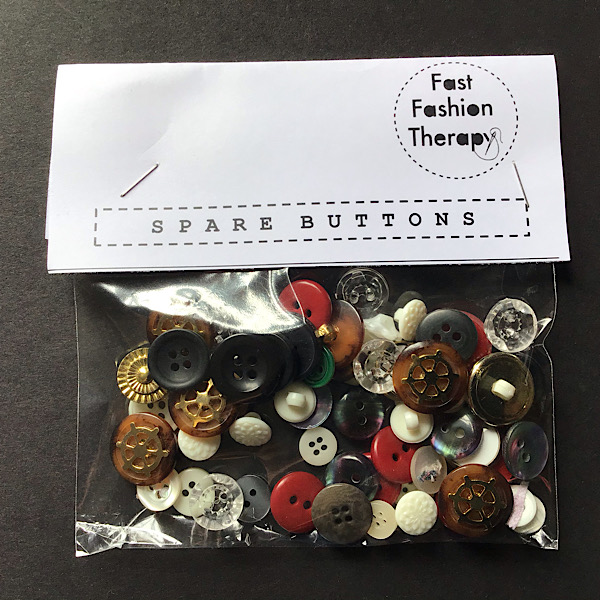
Where to buy spare buttons
Start collecting your own spare buttons in a disused jar. Some garments come with a small packet of spare buttons that can be added to the jar. Charity shops often have packs of random buttons for sale, but we appreciate they are accessible whilst we are social distancing. We have pulled together some of our collection for sale on our Etsy shop. A random mix of buttons apx 30 buttons with some designs having 6 of the same button included (e.g white shirt buttons).