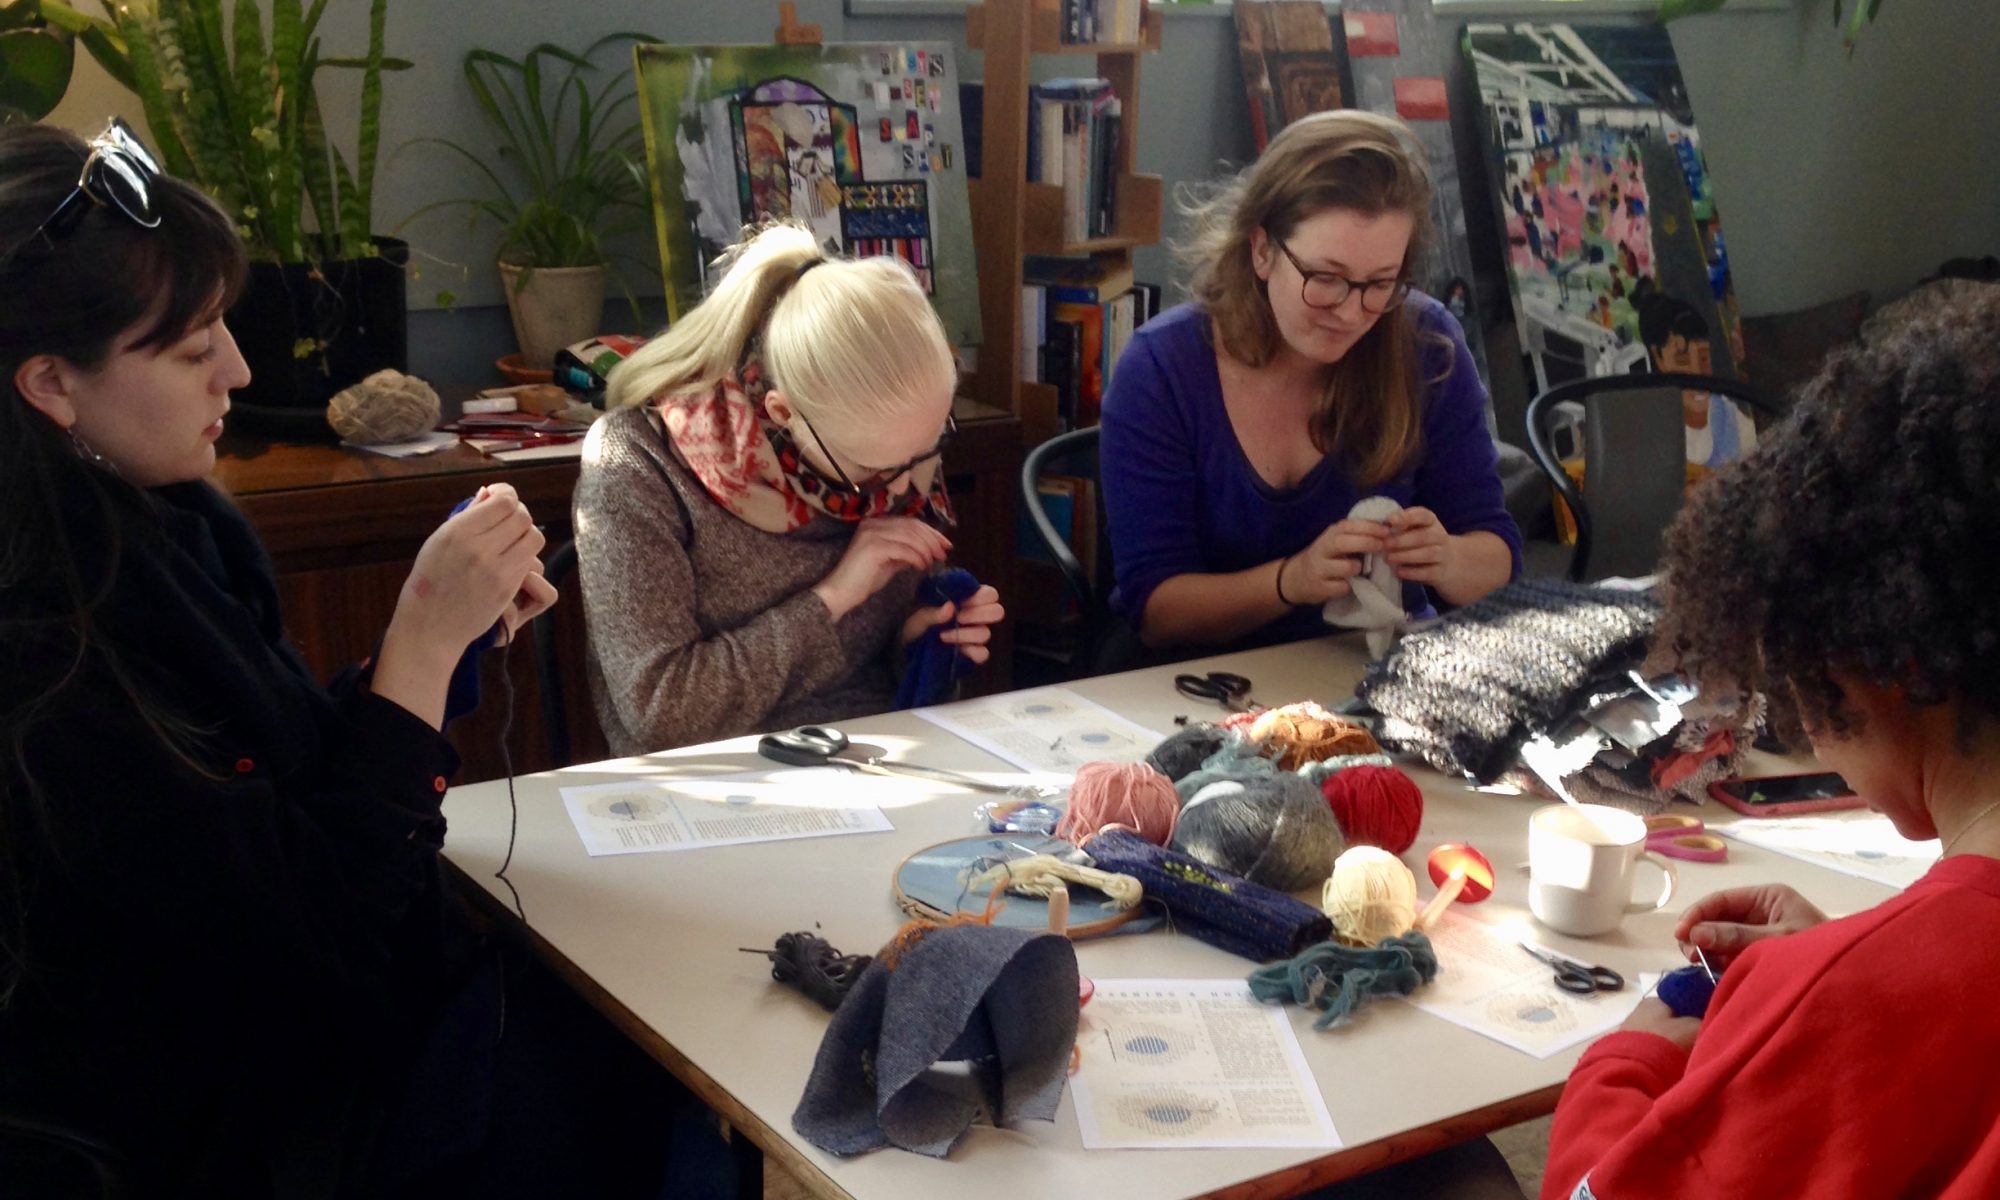
In the last (almost) two years of running workshops, we’ve learnt more about the most common areas of clothing that get damaged with many of our repair videos and posts responding to these. But the damage, whether a moth hole or a tear, can come in all shapes and sizes, and learning to patch on a small swatch of cotton fabric can be a completely different experience to patching on your much-loved clothing.
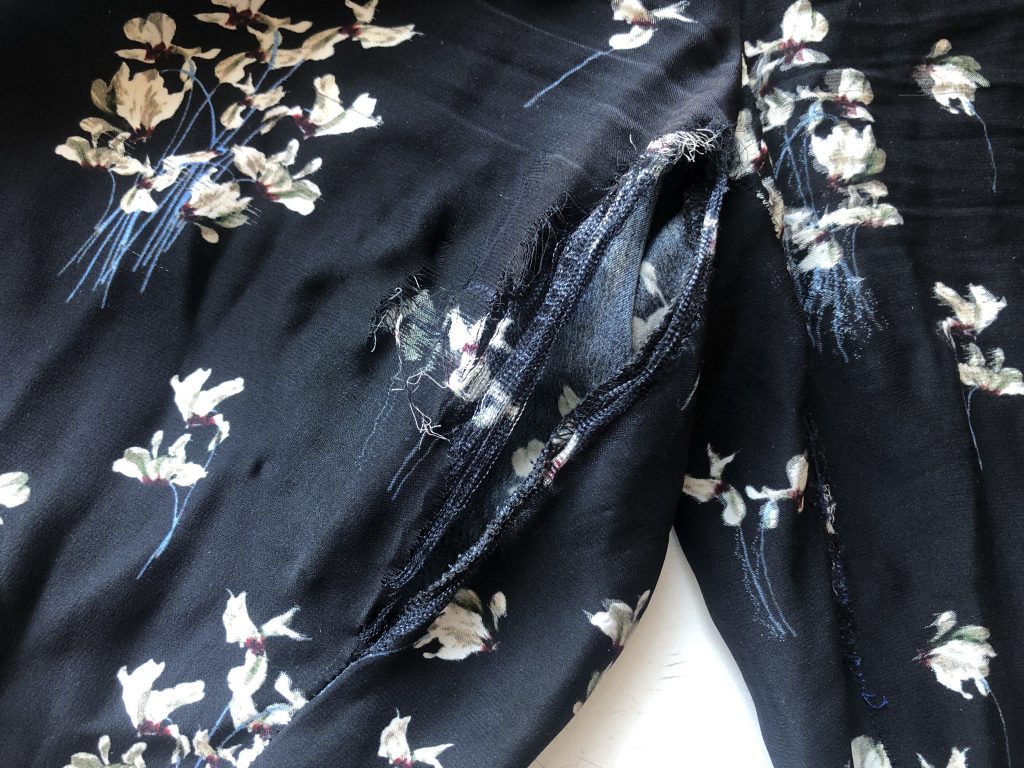
This ‘Repair in Practice’ blog will use some of our most popular mending techniques on a pair of very well-loved silk trousers. These silk trousers have worn down on the inside seam around the crotch at the top of both trouser legs, and the hem on one leg has also come loose.
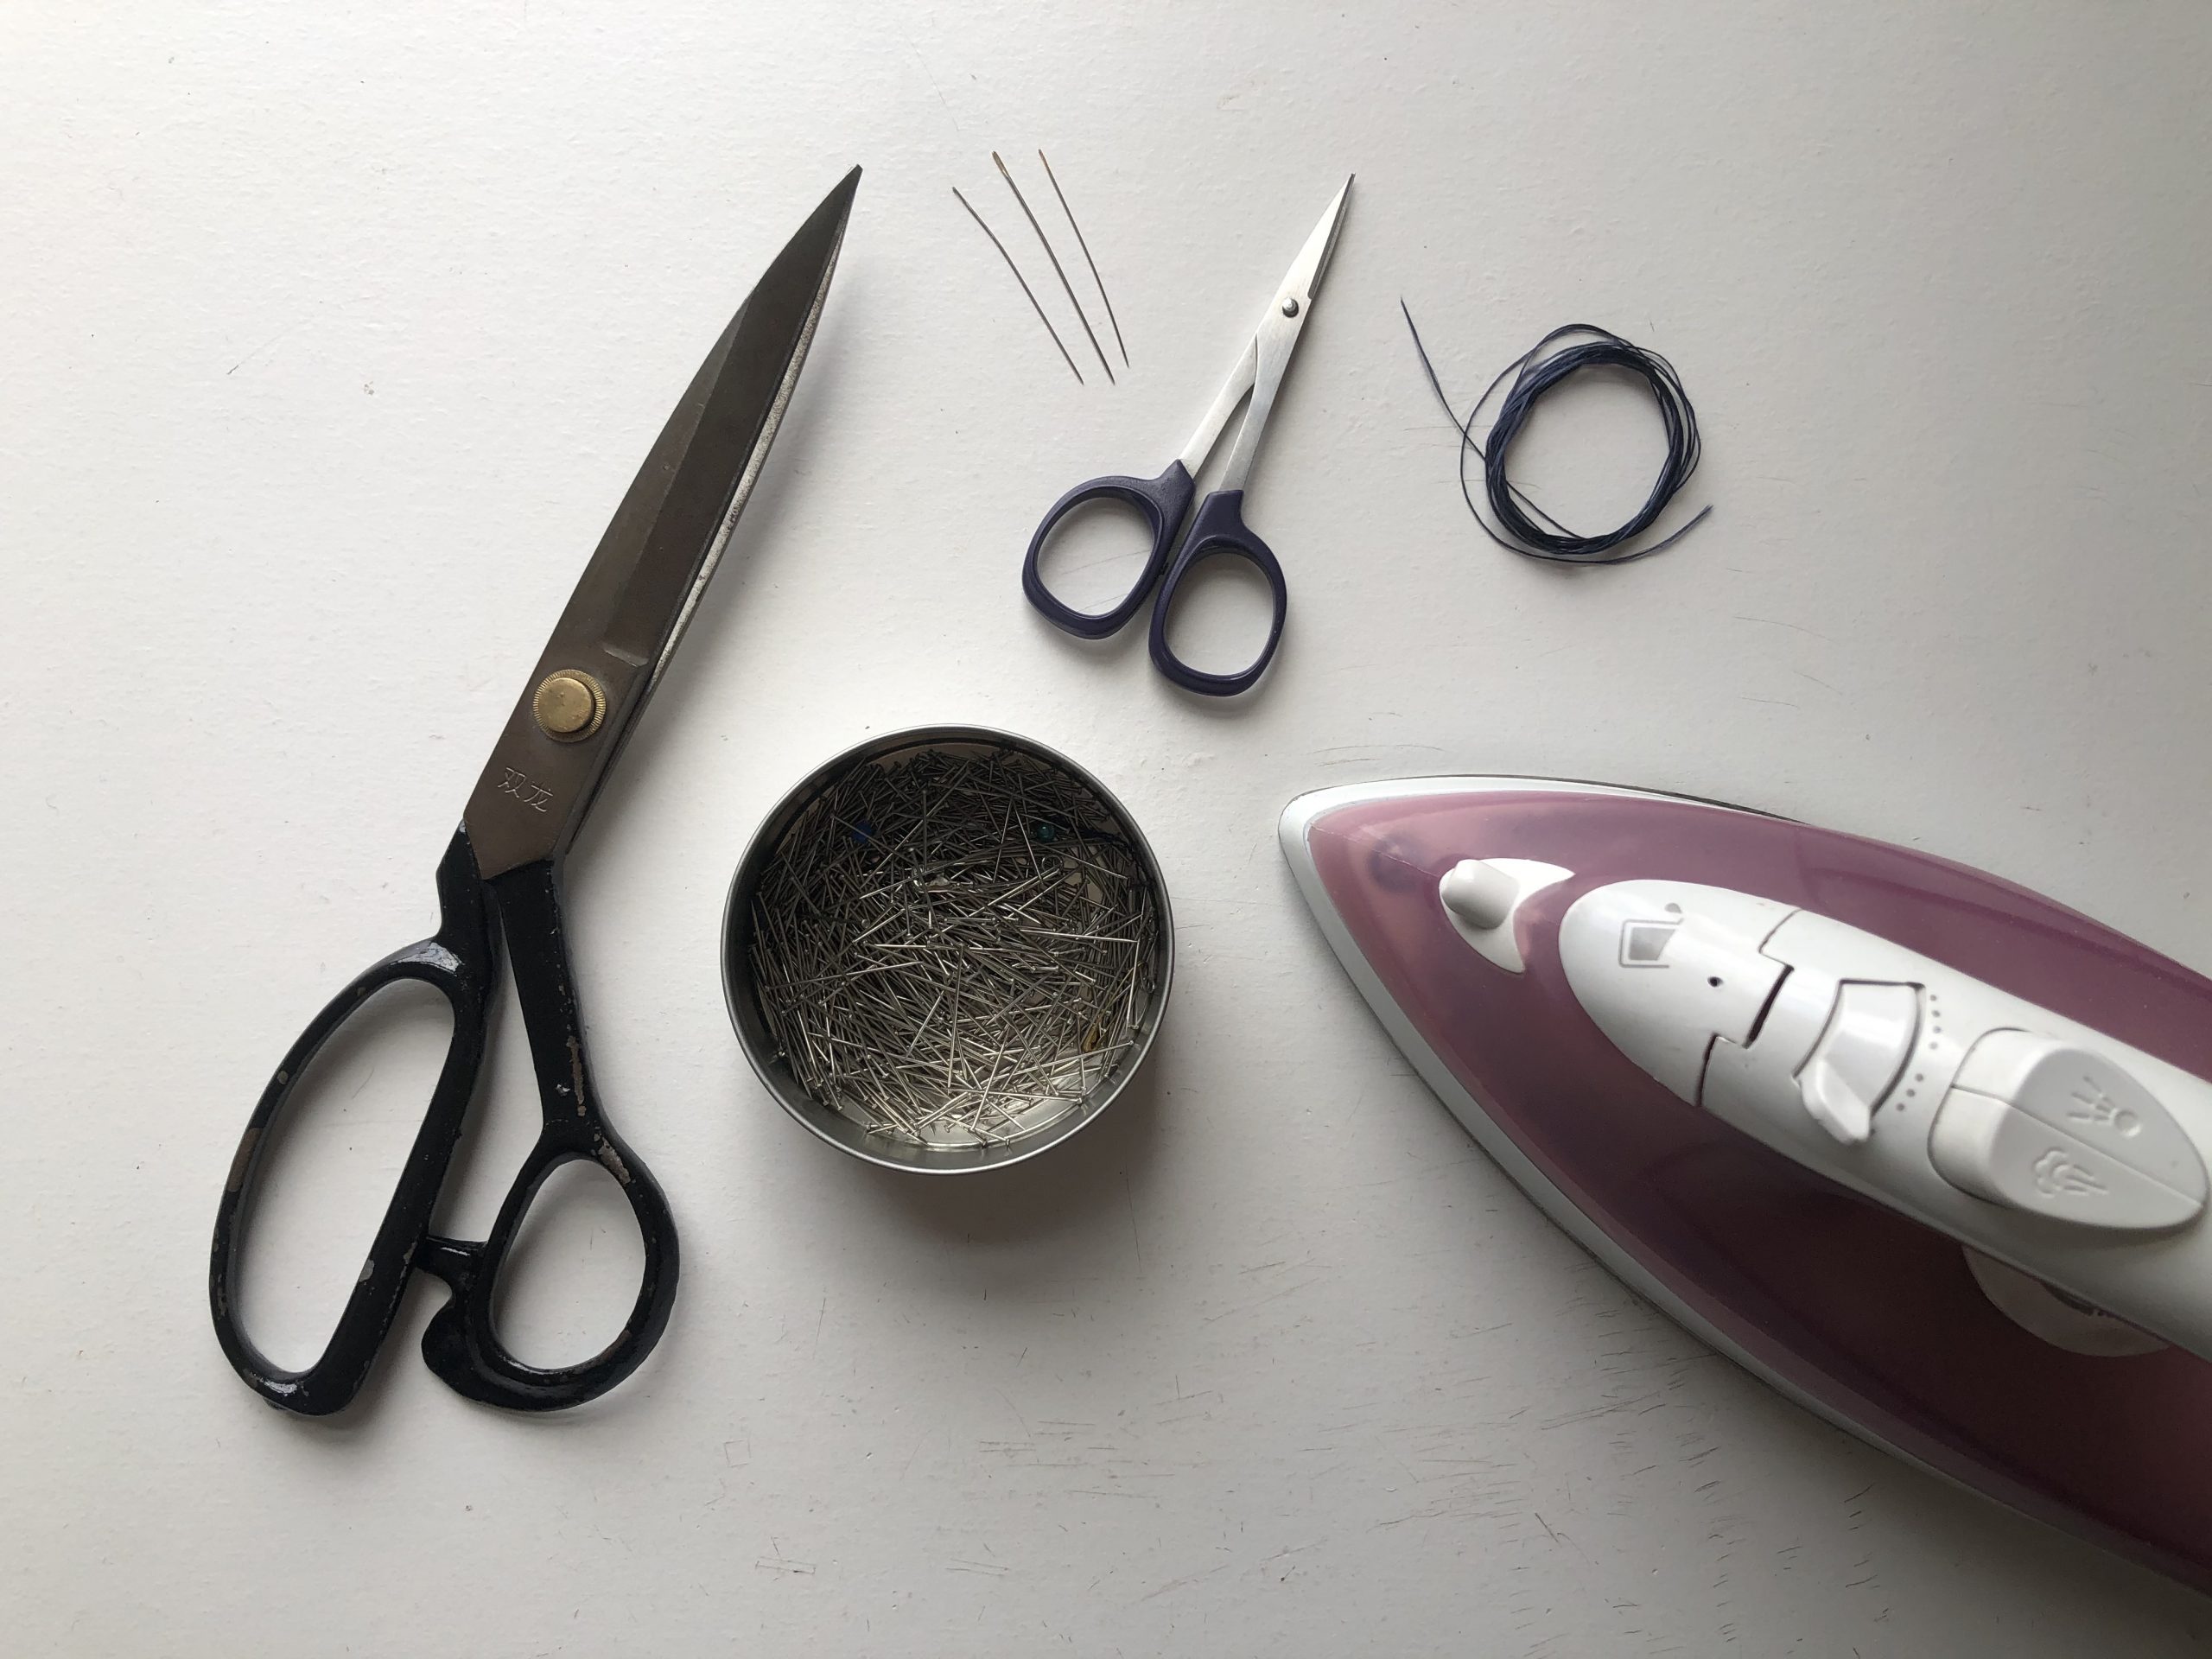
Repairing these trousers didn’t require much in the way of equipment or materials. To complete a similar repair you’d need some fabric scissors (for cutting your patches of fabric to size), small sharp scissors, some fabric pins (you could also use safety pins but they might be too chunky on the silk), hand embroidery needles (thinner ones are better on fine silk), patches of fabric, a matching embroidery thread and an iron.


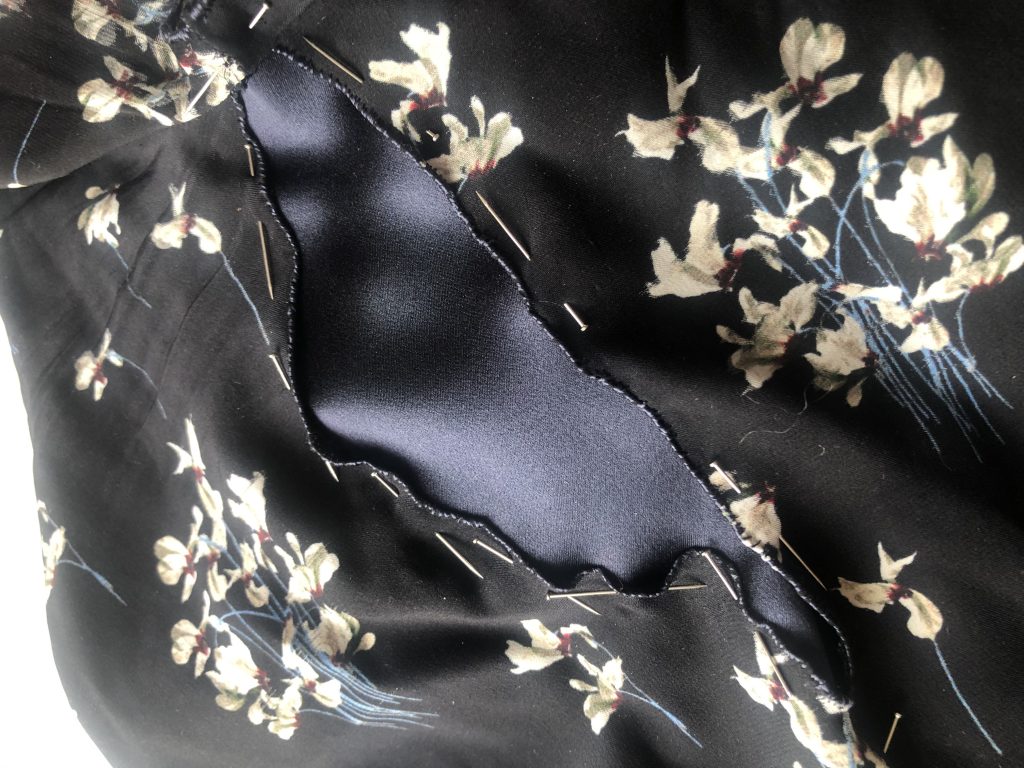
These silk trousers had been previously repaired by their owner when I received them so the first stage of mending was to get the area around the crotch that was most damaged ready to be worked on. The hand-stitching had worked in holding the seam together temporarily but because of how weak the silk fabric had become, the area was in need of some extra reinforcement to be wearable long term. I used a stitch unpicker and some sharp embroidery scissors to take off the hand-stitching that had been holding the seam together.
A common question when repairing and in our workshops is whether you should cut away the frayed edges of a tear or hole. The answer to this can often be a question of personal style, but in this case how fragile the silk was meant that the fray needed to be cut away to prevent further damage. Again, using the small sharp scissors, I trimmed the frayed edges away all the way around the holes at the top of each leg, leaving a smooth, clean edge. If there are any areas near the hole where the fabric hasn’t quite fallen apart but looks weak, it can be a good idea to cut these away too.
You could iron some Bondaweb or fusing on the reverse of the fabric in this area to provide some extra strength. I chose not to in this case as the silk trousers have a really lovely smooth texture and drape that I didn’t want to alter too much.


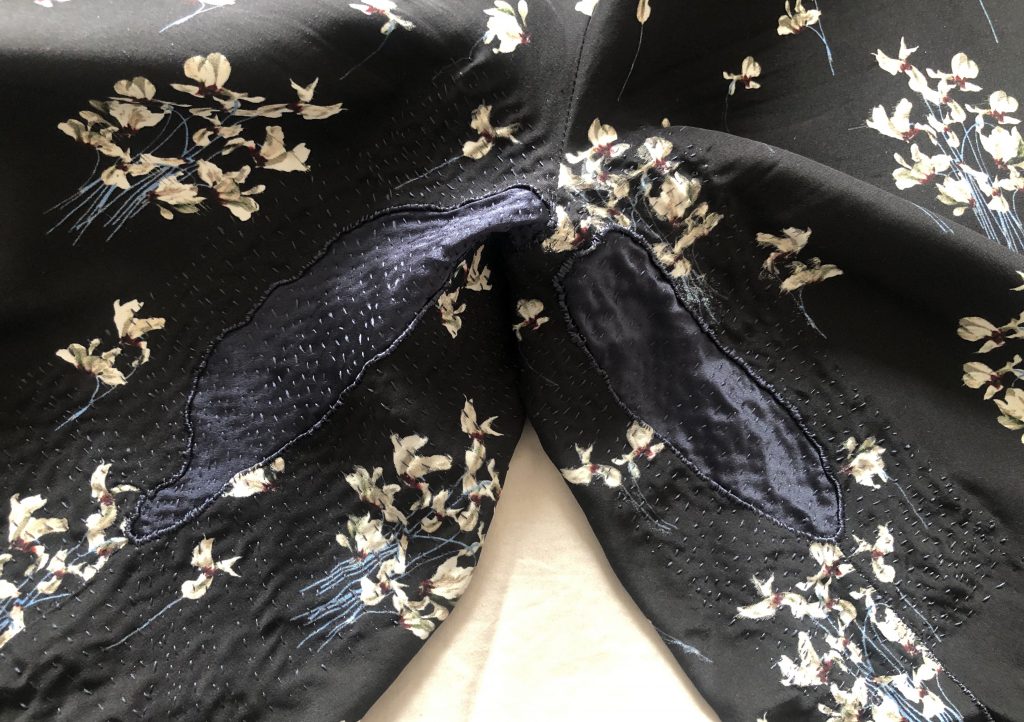
I chose to use the ‘Boro’-inspired patching technique we teach in our workshops to mend this area of the trousers, working with some navy blue silk that was donated to us in a bag of scrap fabric. First I measured the size of the holes I was patching, you need to make the patches of fabric you are working with at least 2cm wider and longer than the size of the hole. In this case, I could see the seam on the trousers was still weak under the hole so I added an extra 5cm to reinforce this area as well and stop it from ripping in the future.
As I wasn’t using Bondaweb on the silk, I needed to hem the edges of the silk patches to stop them from fraying. Using an iron, I folded the edges of the patches twice to tuck the raw edge of the silk inside the hem. The silk can be tricky to fold and press in this way as it is quite slippy so I pressed, pinned and stitched just two edges at a time before moving onto the other two edges. Because the silk I was working with was quite light I found it easiest to sew these hems by hand using a Blind Hemstitch.


I used a navy silk thread to match the patch, but you can use any fine machine or hand embroidery thread that you feel works well with your fabric. The important thing when working with silk is to choose a thread that matches in thickness so it doesn’t pull and snag the silk as you work. Throughout this repair, I threaded my needle with a single length of this thread, no longer than 30cm in length, with a double knot tied at the end of it.
This version of the hemstitch starts with your first stitch going into the fold of the hem so the thread is hidden inside the hem, you can make this stitch quite long around 1cm. Pull the thread all the way through, then with your next stitch catch just a few fibres of the fabric to the right of the hem. This stitch should be roughly parallel to the point where your needle came out of the folded hem.
This hem won’t be visible on your finished item of clothing from the outside so you could use a simple running stitch if you find that easier, but I find the hemstitch gives a smoother finish and texture inside the trousers when worn.


As I didn’t use Bondaweb on the area on the trousers around the hole, I also needed to roughly fold and hem the edge of the hole. You don’t need to iron this edge over as you just need it to be folded once, you can use your thumb and finger to press the fabric in place as you sew. The heat from your hands will hold it in place for a short time so you can work your way around the hole like this.
To stitch this edge down, thread up the needle with a length of the thread you are using and tie a knot at the end of your piece of thread. Bring the needle through from the reverse of the fabric, going through both the fold of the hem and the top layer of fabric so the knot is hidden at the reverse. Repeat this stitch a little to the left of your first stitch so you create a loop that traps the edge of the fold holding it in place. Carry on all the way around the edge of the hole so the folded hem is secure in place.
The stitches do not need to be right next to each other like in this example, you can space them out more if you prefer the look of it, just make sure the gap in between each stitch is no bigger than roughly 5mm. When you’re finished, the edge of the hole you’re working on should be bound by the stitch and there should be no fraying.


At this stage, it can be a good idea to give both the trousers and the silk fabric patch an iron to make sure they are smooth and flat, then you can begin to pin the first patch in place. I started with the larger hole as this meant I could use the small hole as another access point when sewing so I would have more places to reach my needle from when working on the reverse of the trousers. The silk can shift around a lot when you’re pinning in place so take your time with it, the most important thing is to make sure it is smooth in the area where you will start your stitching as the other pins further down the hole can be moved around as you begin to sew.


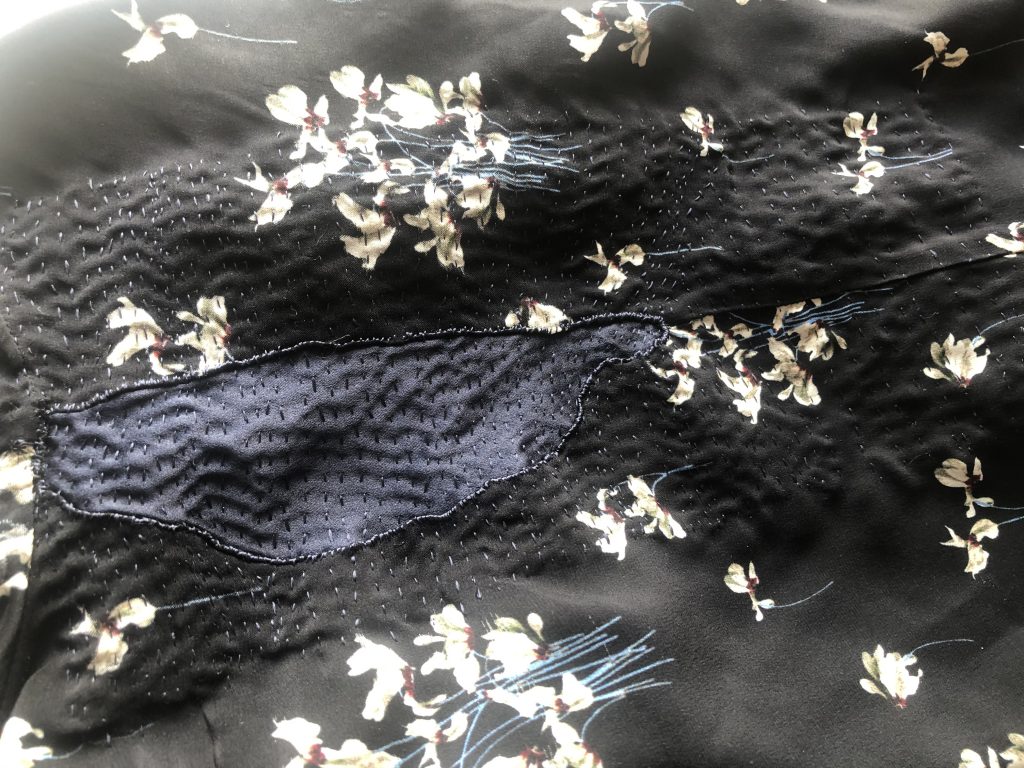
Using a running stitch, often called Sashiko in ‘Boro’ patching, begin to build up lines of stitching running back and forth across the patch and the trousers. So that the silk patch was not flapping on the inside here, I made sure to start and end my line of stitching at either edge of the patch. You could go further than the edge of your patch with your stitching if you want there to be more embellishment. For more detailed help with ‘Boro’, you can watch our tutorial video here.
I carried on the rows of stitching past the bottom of the hole as I wanted to reinforce the area of the seam that was weaker. Once you’ve finished all your rows of stitching, there may be some gaps in between the rows around the edge of the hole where the silk flaps more than you would like. Using the same stitch to the one you used to hem the edges of the hole, you can trap these areas of silk down, just make sure to catch the silk patch and the trousers this time.


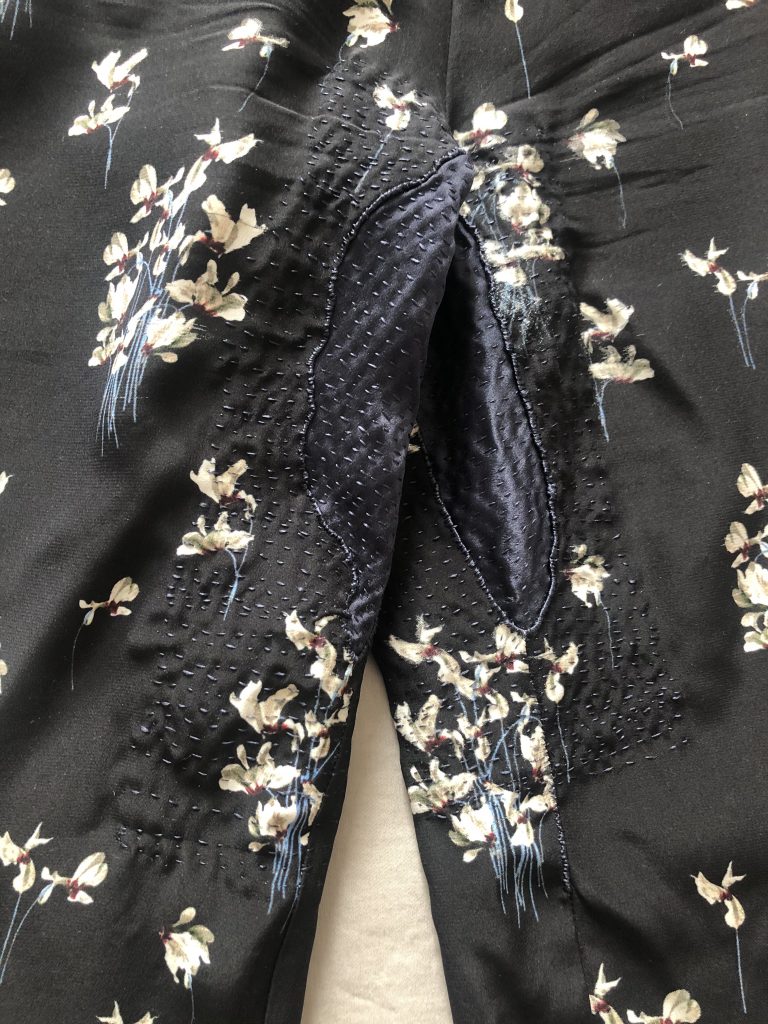
I patched the next hole in the same way, pinning the patch in place first and using a running stitch to secure it in place. This area was trickier to reach than the first one as I had to bring the needle up from the bottom of the trouser leg or through from the waistband when I was starting a new piece of thread. Covering the end of the needle lightly with your fingertip is a good way to avoid catching the silk as you bring the needle through.


Once I finished sewing both patches, I checked how they were looking from the reverse, adding stitching in any areas where it looked like the edge of the patch was flapping or not securely attached. All the patching is done! Next step, fix that hem.


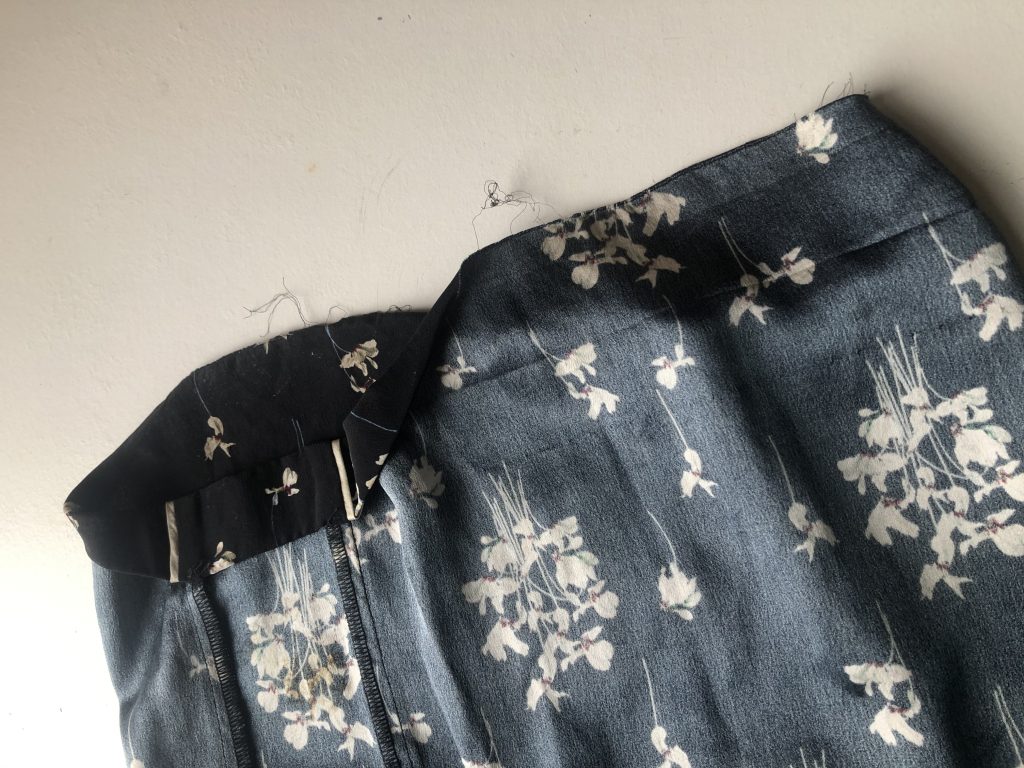
Using the creases left from where the hem was before as a guide, I ironed the loose hem back over, tucking the raw edge inside the hem, and pinned in place. Like with the hem of the patch, I used a blind hemstitch to secure the hem in place. I started my stitching at the inside seam and worked all the way around until it was secure.


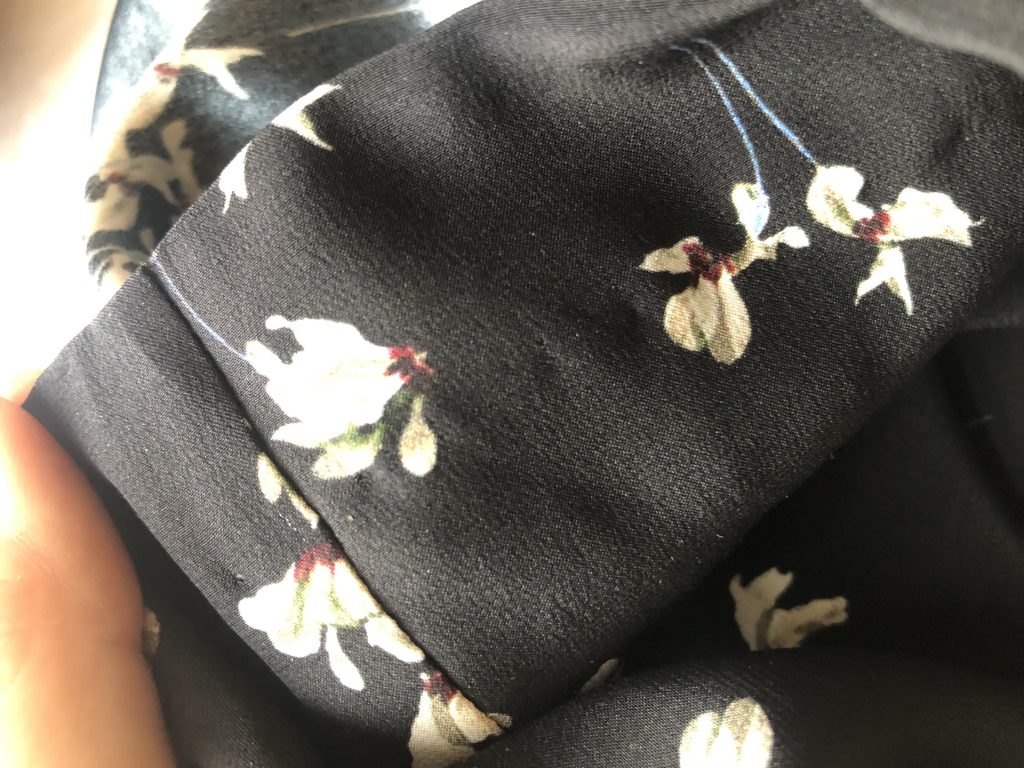
I was more careful here to just catch a few of the fibres when I was stitching into trouser above the hem so the stitching is almost invisible. Silk trouser repair – completed!


If you’re looking for the supplies to get you started with your repair, check out our mending kits over on Etsy.