Sewing machine mending
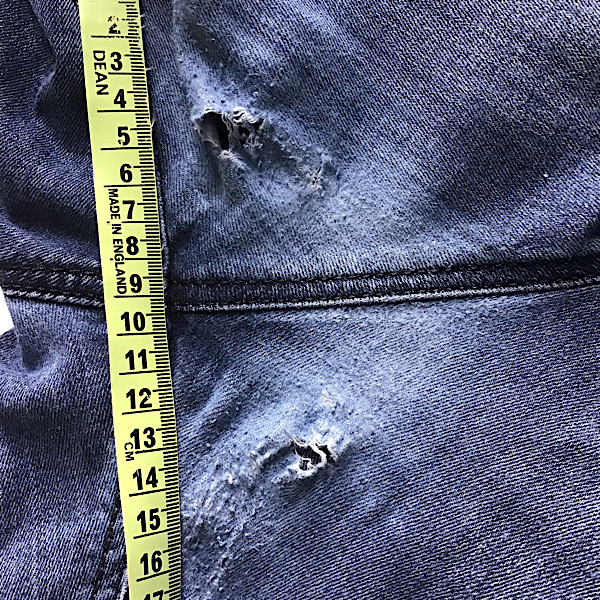
Jeans are one of the most popular items to repair at our workshops. Many people bring along jeans that have worn away between the thighs and ask if they can be repaired – yes is the answer and there are two ways of repairing. By hand and a Boro style stitch as shown in part one of this jeans mending series. In part two we show how to mend jeans with a sewing machine.
Sewing thread
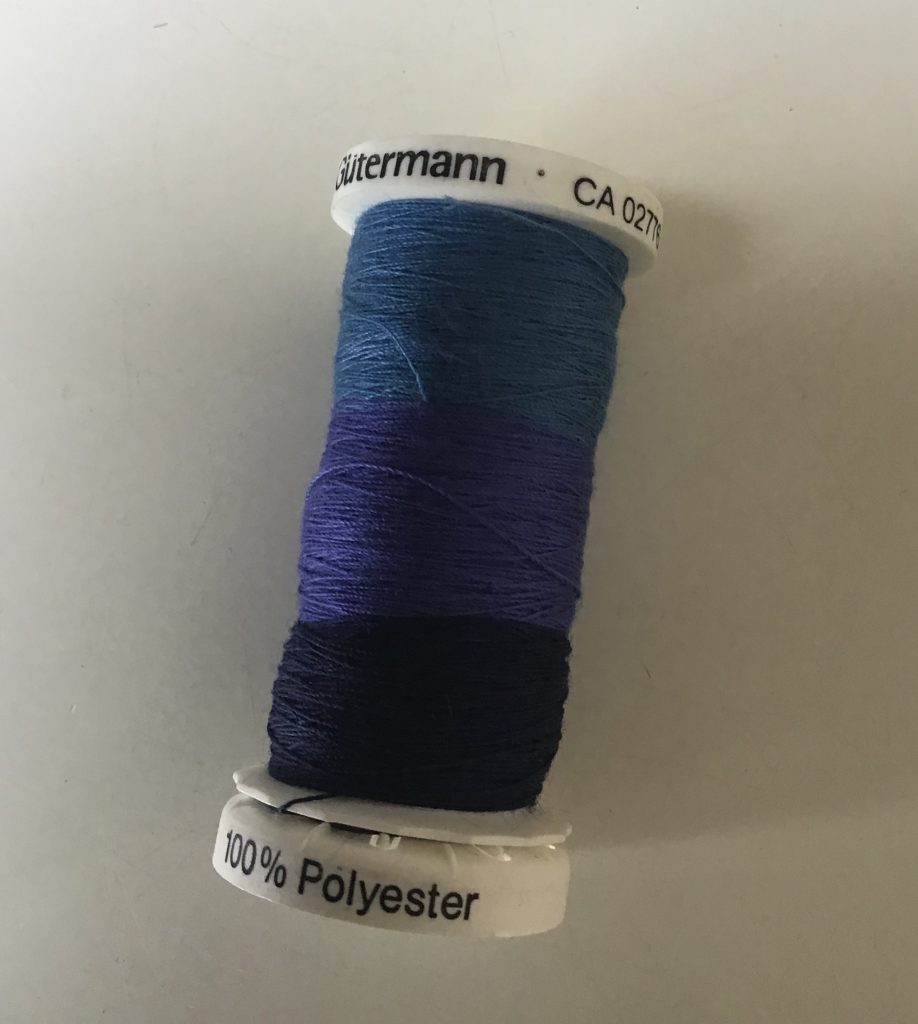
Usually people prefer to mend their jeans in this particular spot as inconspicuously as possible. Jeans come in so many different colours and shades try and match the sewing thread as close as possible. Mid-blue and pale grey work well on worn denim jeans. As part of our denim patching kit we offer 3 different colour blue threads on one reel. All are from larger reels of deadstock wound onto used plastic reels (thanks to a Facebook sewing group).
Sewing Kit
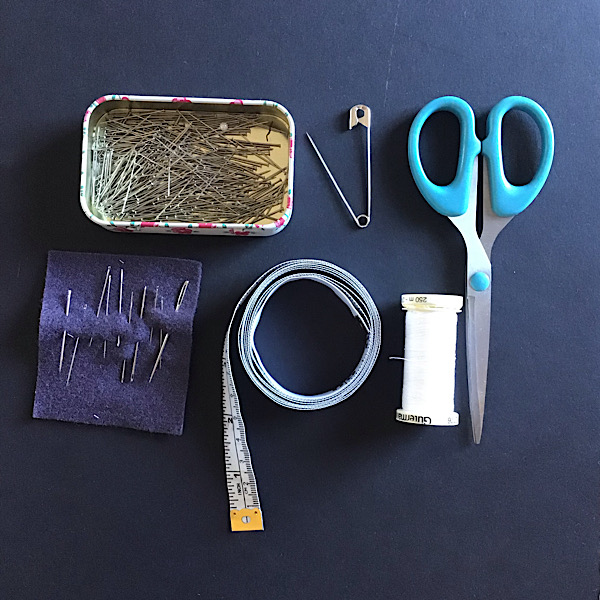
- Sharp scissors
- Sewing needle (sharp ended to get through the denim)
- Dressmaker pins to hold the patch in place or safety pins also work well
- Tape measure or ruler to measure the patch
- Thread – I use a blue to match the denim (not white shown in the photo)
- Denim patching kits available on our Etsy shop
- *TOP TIP* save pieces of denim cut from taking jeans up or save old jeans to use for patches.
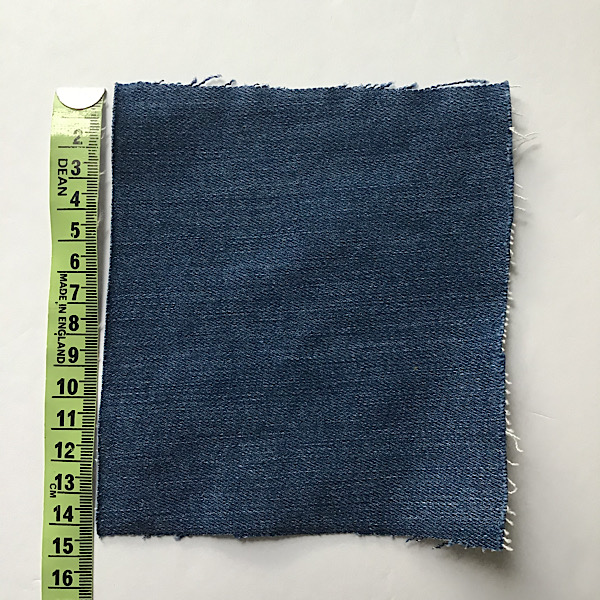
Denim patches
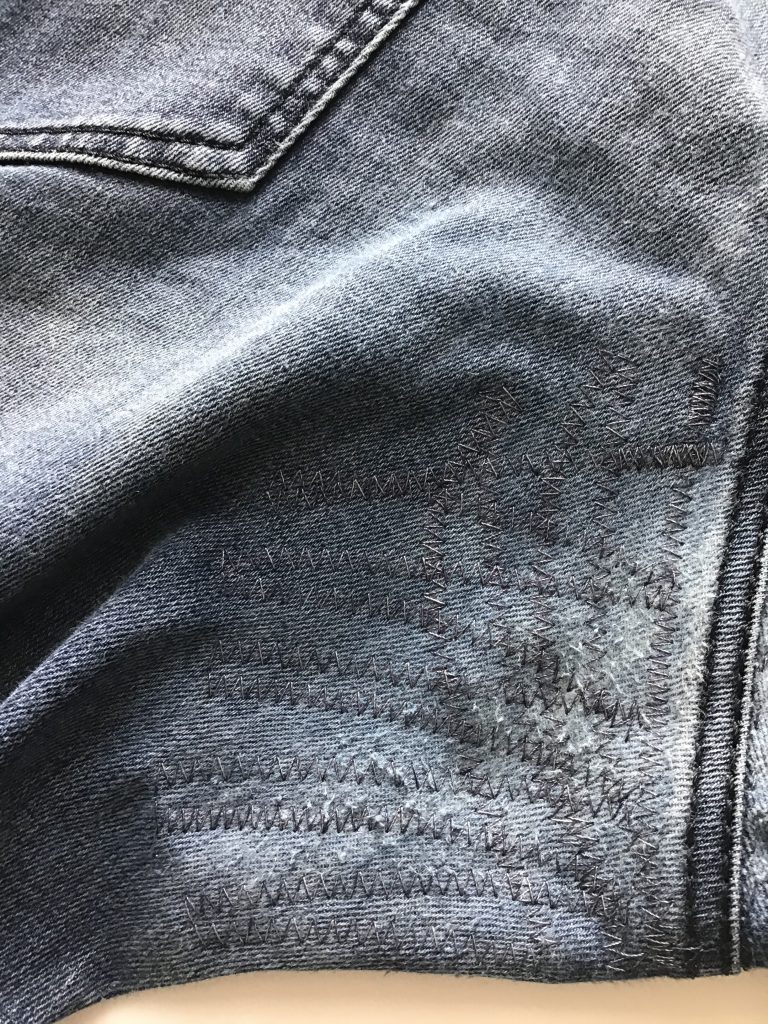
As in part 1 of this blog the first step is to measure the hole in the jeans. If the hole is on both sides of the centre seam then use one patch to fit over the whole area. Cut a piece of denim that is a similar weight, feel and texture to the jeans you are mending. Set your machine to a zig zag setting. Nearly all domestic sewing machines have a zig zag setting. Have a practice on a scrap piece of fabric and change the stitch width and length settings to get the shape of zig zag that you prefer. Zig zag stitch just inside the outer edge of the patch. Sew around all 4 edges to prevent fraying.
Keep the jeans the right side out and open the fastenings as far as they will go. Place the patch over the the holes. Usually the holes are on the back side of the jeans, keep the patch on that side of the centre seam. Use dressmakers pins to pin in place.
- Working on the right side of the jeans, feed the jeans under the presser foot of the machine. Take your time and wiggle the jeans to get them in place
- Before you start sewing, trace the patch with your finger to make sure it is still in place and hasn’t folded over
- Starting at the point where the two centre seams cross, sew a zig zag line following the line of one of the centre seams
- Stop at the edge of the patch taking care not to go over the pins otherwise you will break a needle
- Put the needle into the denim, lift up the presser foot and pivot the jeans 90 degrees
- You want to come back and sew in the opposite direction that you have just sewn. But don’t sew over the same line, move the fabric of the jeans over so you end up creating rows of zig zag stitching. They don’t have to be exact
- Once you have gone one way, turn the jeans so that you follow the line of the other centre seam. Crossing over the zig zag lines you have just sewn.
- Demonstrated in the video below *top tip* if your sewing machine is missing stitches and not sewing the zig zag properly, trying switching to a denim needle. It isn’t always necessary to buy one specially but it does help this error.
Sewing machine stitching vs. hand stitching
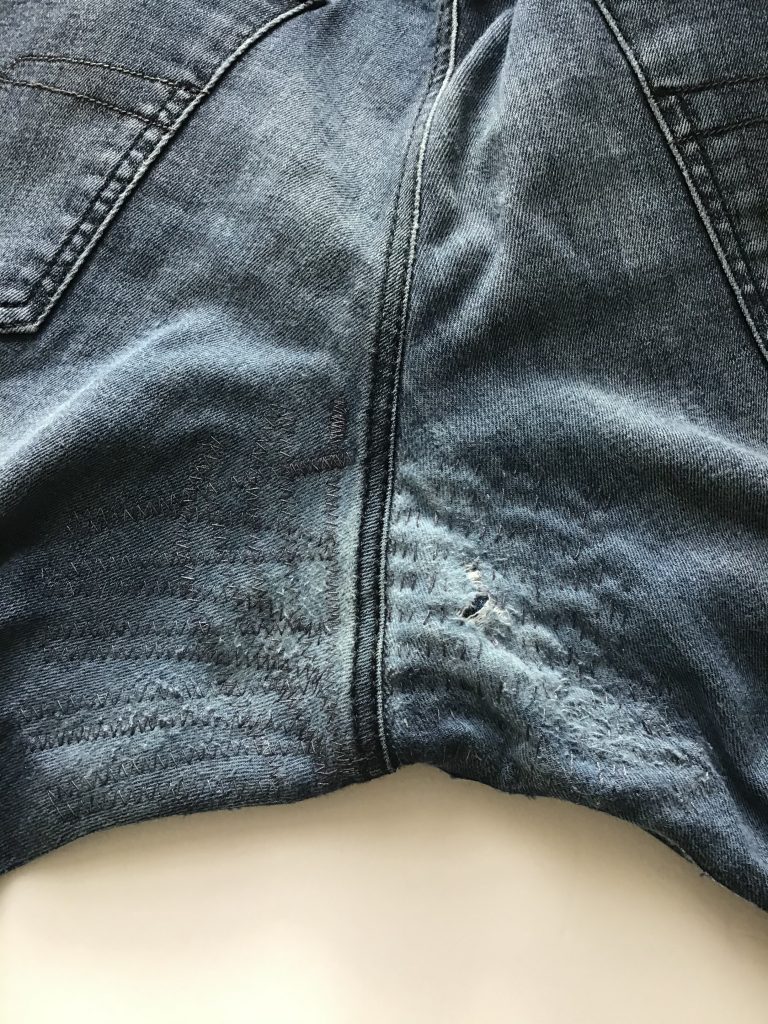
I’ve used both techniques on this one pair of jeans to demonstrate the difference. Both work well and are both secure. Personally I like the meditative effect of hand sewing but machine sewing gets the job done quicker. Both methods won’t last forever. If another hole appears or the patching has worn away, place another patch on top and repeat the instructions. Don’t remove the original patching, the new patch will make it stronger. Want to find out more? Come along to one of our clothes mending workshops